Agent Integration
In the following section we describe in detail how to setup and link an Tributech Agent with an existing Tributech Node. We will show how to gain access to the Tributech Docker Registry and startup an Tributech Agent with a Tributech Simulated Source.
Deployments
First we need to setup an environment for the execution of the Tributech Software components. We will use Docker Compose to run a Tributech Agent and Tributech Simulated Source in the Docker Containers. If you want to use any other container runtime (e.g. containerd) please talk to your contact person at Tributech or send an email to our Customer Advisory Team.
Requirements
The environment must meet the following hardware and software requirements:
Hardware Requirements
| Type | Minimum Requirement | Recommend Requirement |
|---|---|---|
| CPU | 1 Core (x86-64 / ARM32 ) | 2 Cores |
| RAM | 1 GB Ram | 2 GB Ram |
The Tributech Agent itself does not actually consume that much RAM, these are the requirements for the whole system. Keep in mind that these requirements strongly depend on the overall setup and the actual workload of the Tributech Agent. The stated Hardware Requirements are recommendations for small and medium workloads (based on volume of data processed). If you have any questions regarding infrastructure requirements, please talk to your contact person at Tributech or send an email to our Customer Advisory Team.
Software Requirements
| Type | Required | Preferred |
|---|---|---|
| OS | Any current Linux Distribution | Ubuntu 18.04 LTS or later |
| Runtime | Docker Engine (≥20) + Docker-Compose (≥1.26) | Docker Engine + Docker-Compose |
Docker-Compose Setup
The Tributech Agent Services can be run using Docker Engine as a container runtime. We use Docker Compose for management/orchestration of the Docker services.
sudo apt-get update
sudo apt-get install \
    apt-transport-https \
    ca-certificates \
    curl \
    gnupg \
    lsb-release
curl -fsSL https://download.docker.com/linux/ubuntu/gpg | sudo gpg --dearmor -o /usr/share/keyrings/docker-archive-keyring.gpg
echo \
"deb [arch=amd64 signed-by=/usr/share/keyrings/docker-archive-keyring.gpg] https://download.docker.com/linux/ubuntu \
$(lsb_release -cs) stable" | sudo tee /etc/apt/sources.list.d/docker.list > /dev/null
sudo apt-get update
sudo apt-get install docker-ce docker-ce-cli containerd.io
sudo apt-get install docker-compose
If you want to enable non-root users to execute docker commands visit Post-install.
Configurations
After completing the installation process for our environment we now need to retrieve the Tributech Docker Images and configure the Docker-Compose environment as follows:
Authentication
In order to gain access to the Tributech Agent docker image we need to provide docker with the credentials to access the private Tributech Docker Registry. The authentication information can be found in the Secrets section of the Tributech Node.
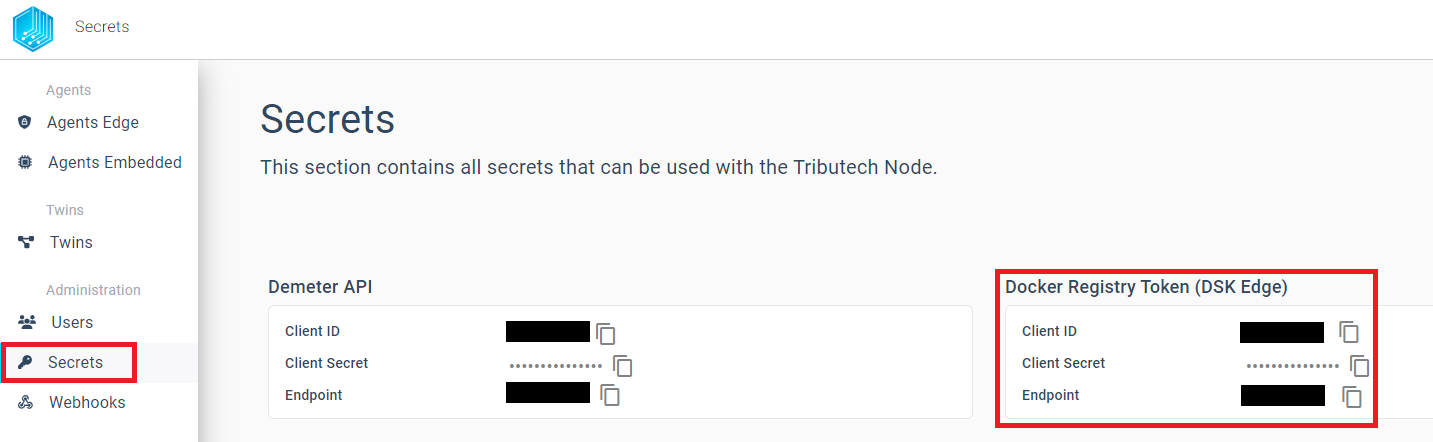
The following command provides docker with the required permissions to access the private Tributech Docker Registry. For more information on docker authentication visit docker login.
echo <Client Secret> | docker login --username <Client ID> --password-stdin <Endpoint>
Docker-Compose environment
We have a docker-compose.yml prepared for an quick and easy setup with a Tributech Simulated Source:
version: "3.6"

services:
  source-simulated:
    image: ${DOCKER_REGISTRY-tributech.azurecr.io/}tributech-source-simulated:${SOURCE_TAG:-latest}
    depends_on:
      - mosquitto-server-simulated
      - tributech-agent-simulated
    environment:
      - MqttOptions__MQTTHost=mosquitto-server-simulated
      - Logging__LogLevel__Default=Debug
    networks:
      - simulated-net
    restart: unless-stopped
    logging:
      driver: "json-file"
      options:
        max-size: "2m"
        max-file: "5"

  tributech-agent-simulated:
    image: ${DOCKER_REGISTRY-tributech.azurecr.io/}tributech-agent:${AGENT_TAG:-latest}
    depends_on:
      - mosquitto-server-simulated
    environment:
      - Logging__LogLevel__Default=Debug
      - Logging__Console__FormatterName=simple
      - MqttOptions__MQTTHost=mosquitto-server-simulated
      - EdgeDeviceOptions__AgentID=${AGENT_ID:?"The variable AGENT_ID_SIMULATED needs to be configured in the .env file."}
      - EdgeDeviceOptions__NodeUrl=${NODE_URL:?"The variable NODE_URL needs to be configured in the .env file."}
    ports:
      - "5000:8080"
    networks:
      - simulated-net
    volumes:
      - ./volumes/simulated/agent/:/app/data # volume mapping for permanent storage of keys and datatwin file
    restart: unless-stopped
    logging:
      driver: "json-file"
      options:
        max-size: "2m"
        max-file: "5"

  mosquitto-server-simulated:
    image: eclipse-mosquitto:${MQTT_TAG:-1.6}
    networks:
      - simulated-net
    # ports:
    # - '1883:1883' # MQTT
    # - "127.0.0.1:9001:9001" # web-socket
    restart: unless-stopped

networks:
  simulated-net:
The docker-compose.yml can be used without any changes. However, we also need to create a .env file which contains the configuration details, for our docker-compose environment. The content of the file contains all relevant information about the docker image tags and the AGENT_ID. The AGENT_ID is a GUID that can be freely chosen, for easy recognition we use 00000000-0000-0000-0000-000000000007. We will use the AGENT_ID later on in the linking process to validate that we link the correct Tributech Agent with our Tributech Node. In our example the .env file looks as follows:
AGENT_ID=00000000-0000-0000-0000-000000000007
NODE_URL=https://my-environment.tributech-node.com
We can now Startup the environment by running the following command:
docker-compose up -d
Validate that all containers are running. The output should return that every container is in the state Up
docker-compose ps
If you encounter problems with starting the containers please consult the official docker documentation docker login and docker compose CLI.
Link Agent
After successfully starting the docker compose setup, in the previous step, we can now link the agent with the Tributech Node. Without completing the linking process the Tributech Node will not be able to receive any data from the Tributech Agent.
TBD_AGENT_MANGEMENT
Verify
In order to detect data tampering we provide the possibility to audit each stream individually and quickly find failed validations. We can either use graph a to visually find problems or a table to filter proofs with predefined filters. We will describe both options in the following sections.
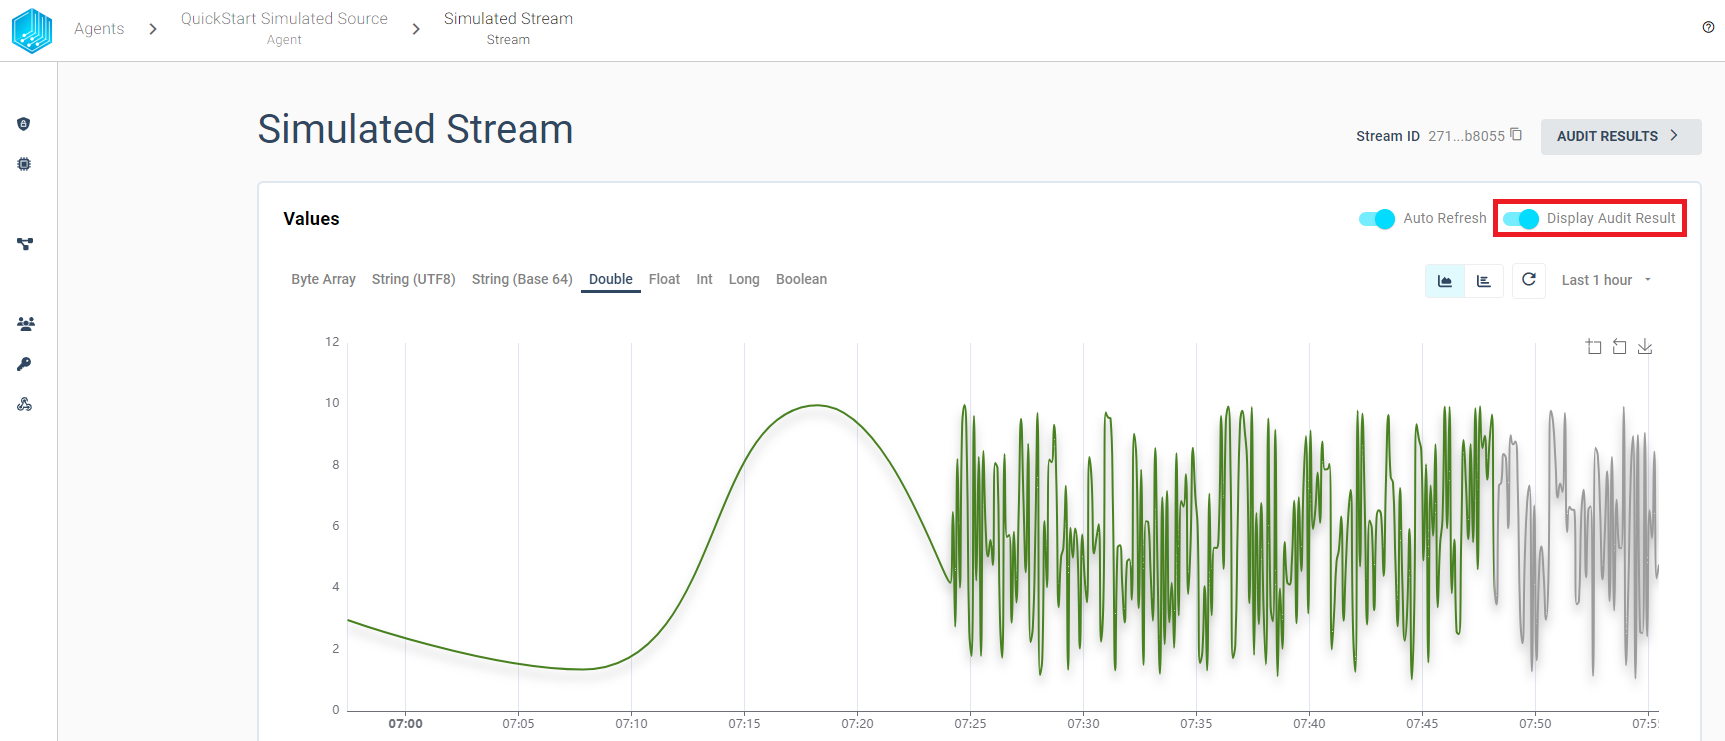
Validation Graph
The Validation Graph can be displayed by clicking Display Audit Result and contains three different colors:
- gray - validation is pending
- green - validation was successful
- red - validation was not successful
Validation Table
In Order to view every created proof with its validation history in table format we can use the AUDIT RESULTS button from the stream overview:
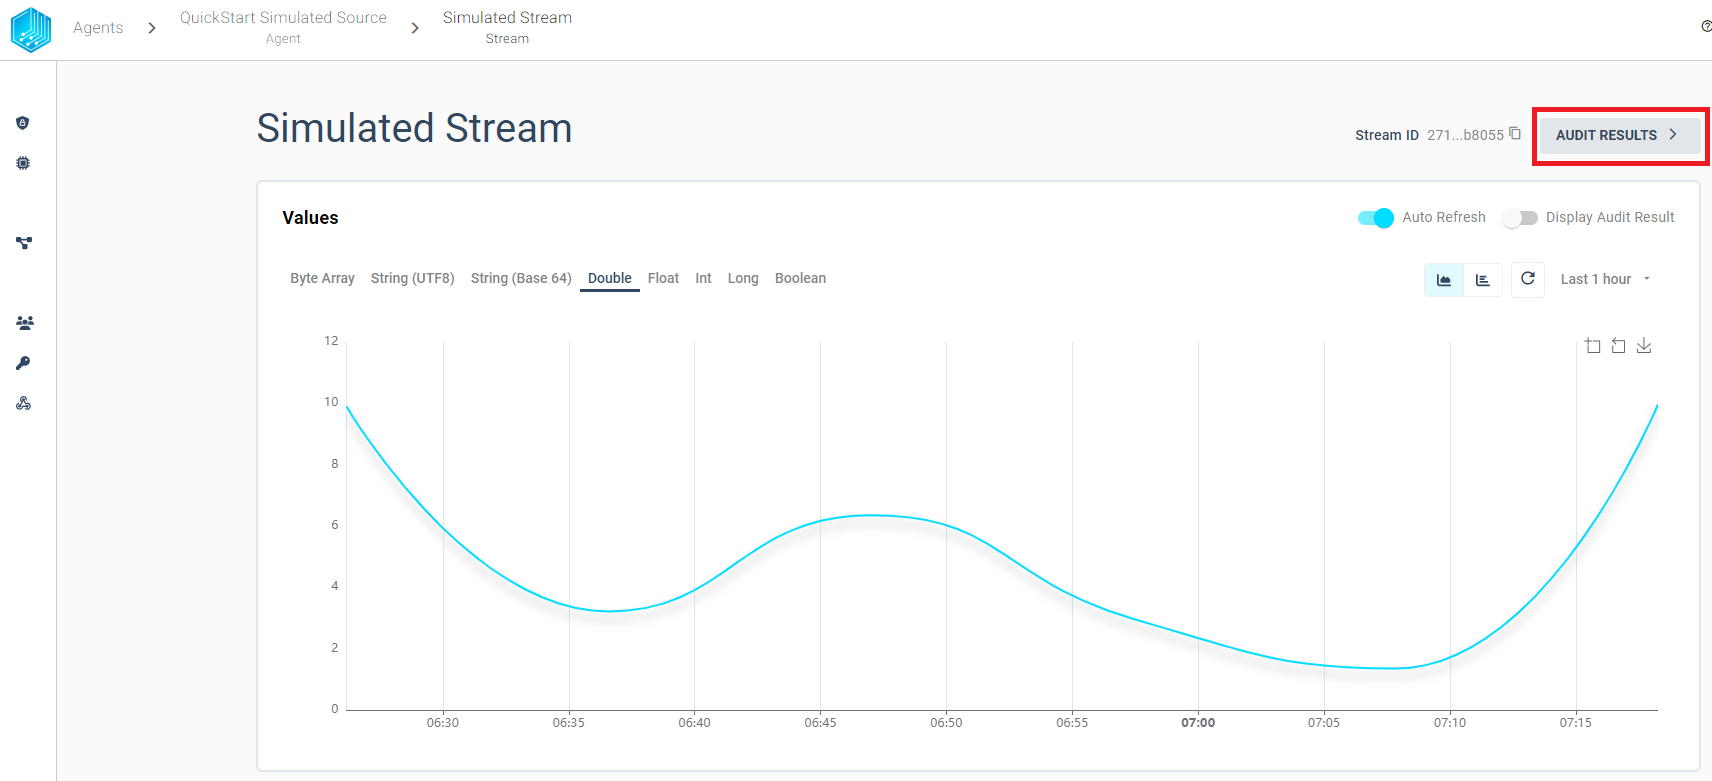
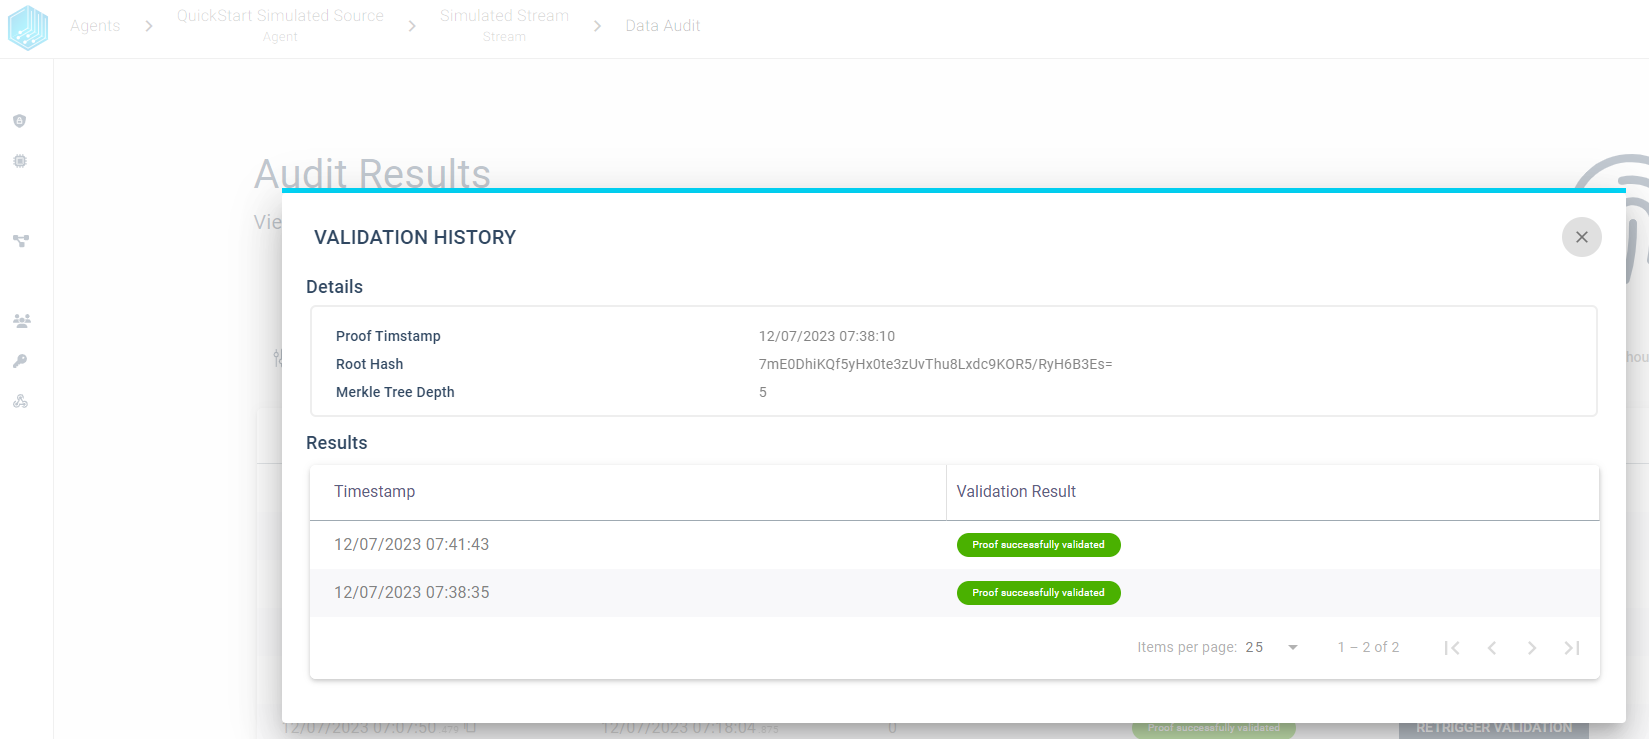
The audit results table view provides the possibility to filter the audit results based on the validation result. We can use the filter to quickly find failed validations and inspect the validation history for a given proof. We want to highlight some features to quickly get started with the audit:
Overview - Display all created proofs in timespan sorted by Proof Timestamp

Filter - Limit the displayed audit results based on the validation result
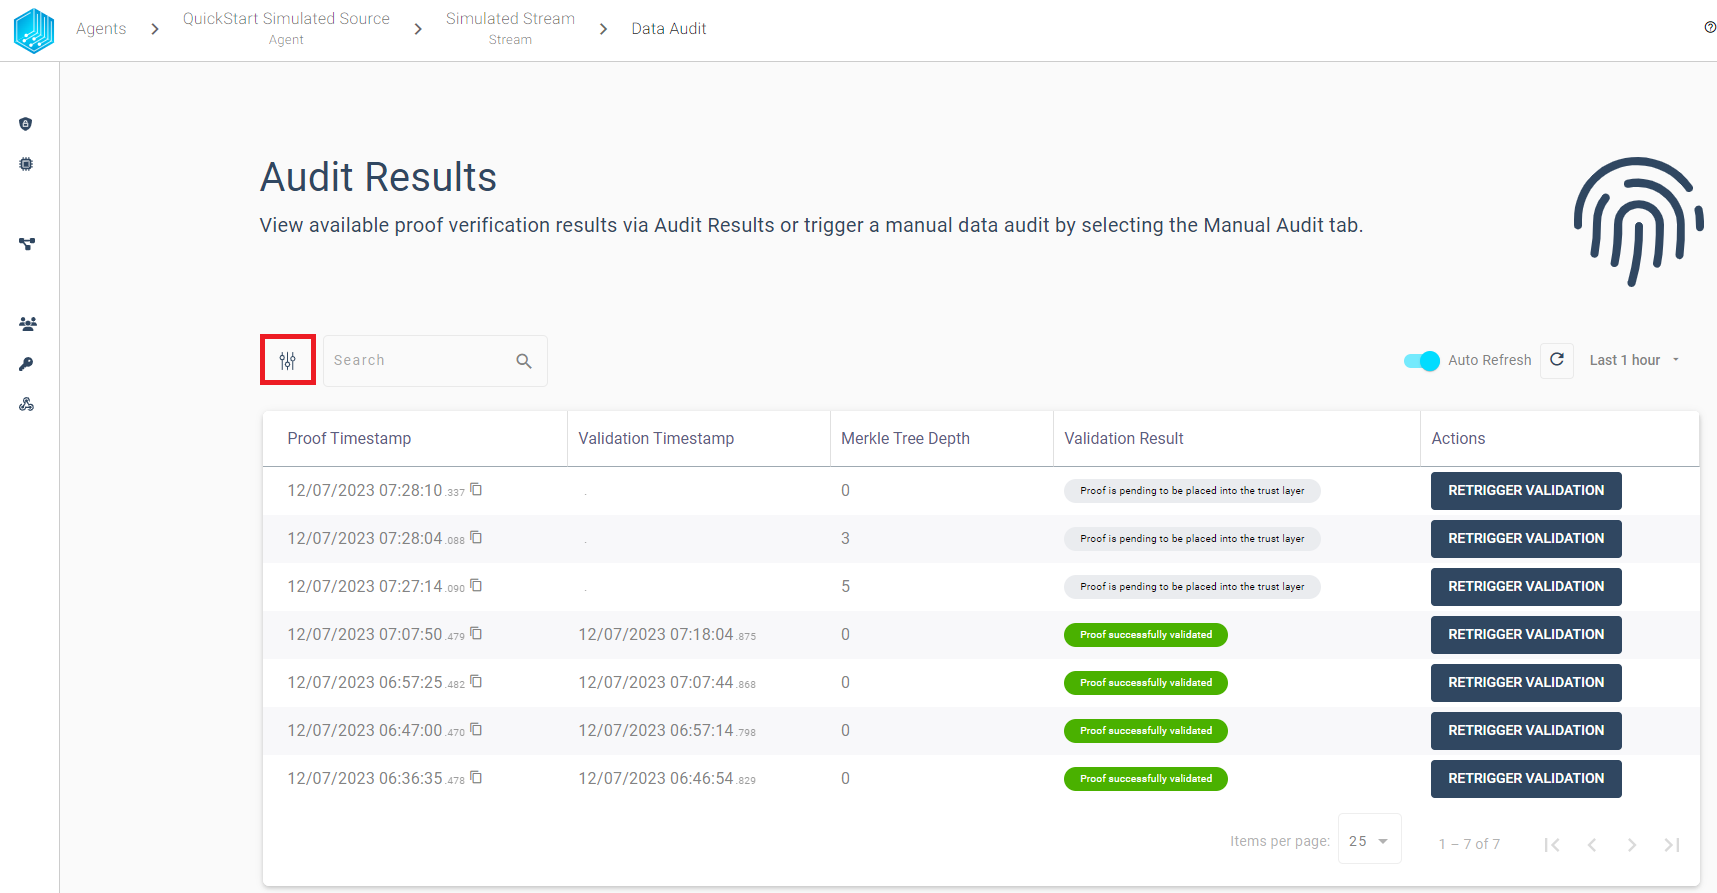
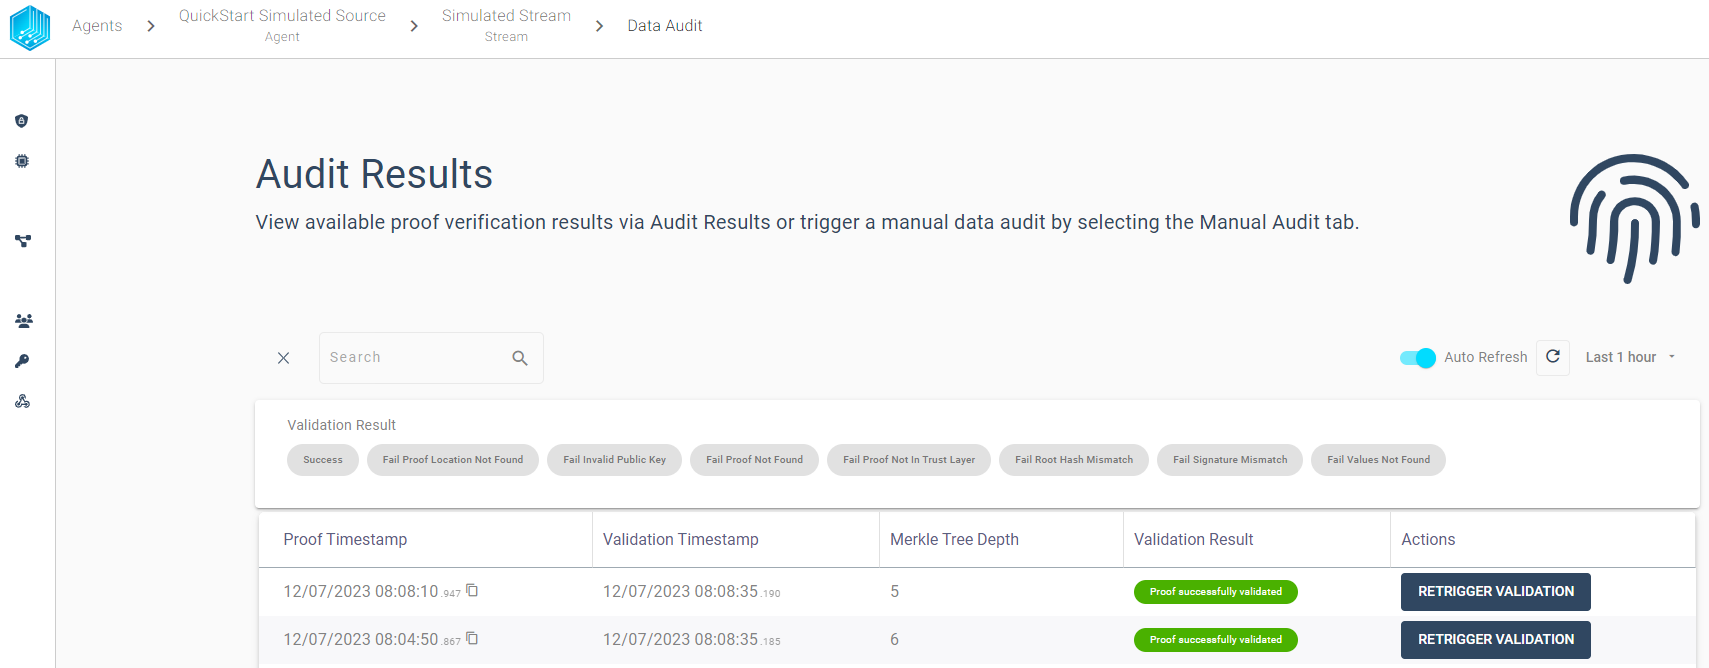
Retrigger - Validation can be triggered manually and the table view will always display the latest validation result for any proof.

History - By selecting a proof row we can inspect the validation history for each proof.