Setup
In the following section we describe how to setup and activate a Tributech Agent with an existing Tributech Node. We assume that all Requirements are met and a running Tributech Node is accessible. The goal is to create a basic setup with a Simulated Tributech Source that will generate random data and send it to the Tributech Agent via MQTT. The Tributech Agent will create proofs for the received values which can later be inspected in the Tributech Node.
⚠️ Requirements must be satisfied
⚠️ Tributech Node must be running and accessible
We will use Docker Engine and Docker Compose in our examples to show how to get an edge device up and running with all the required services.
General Process Overview
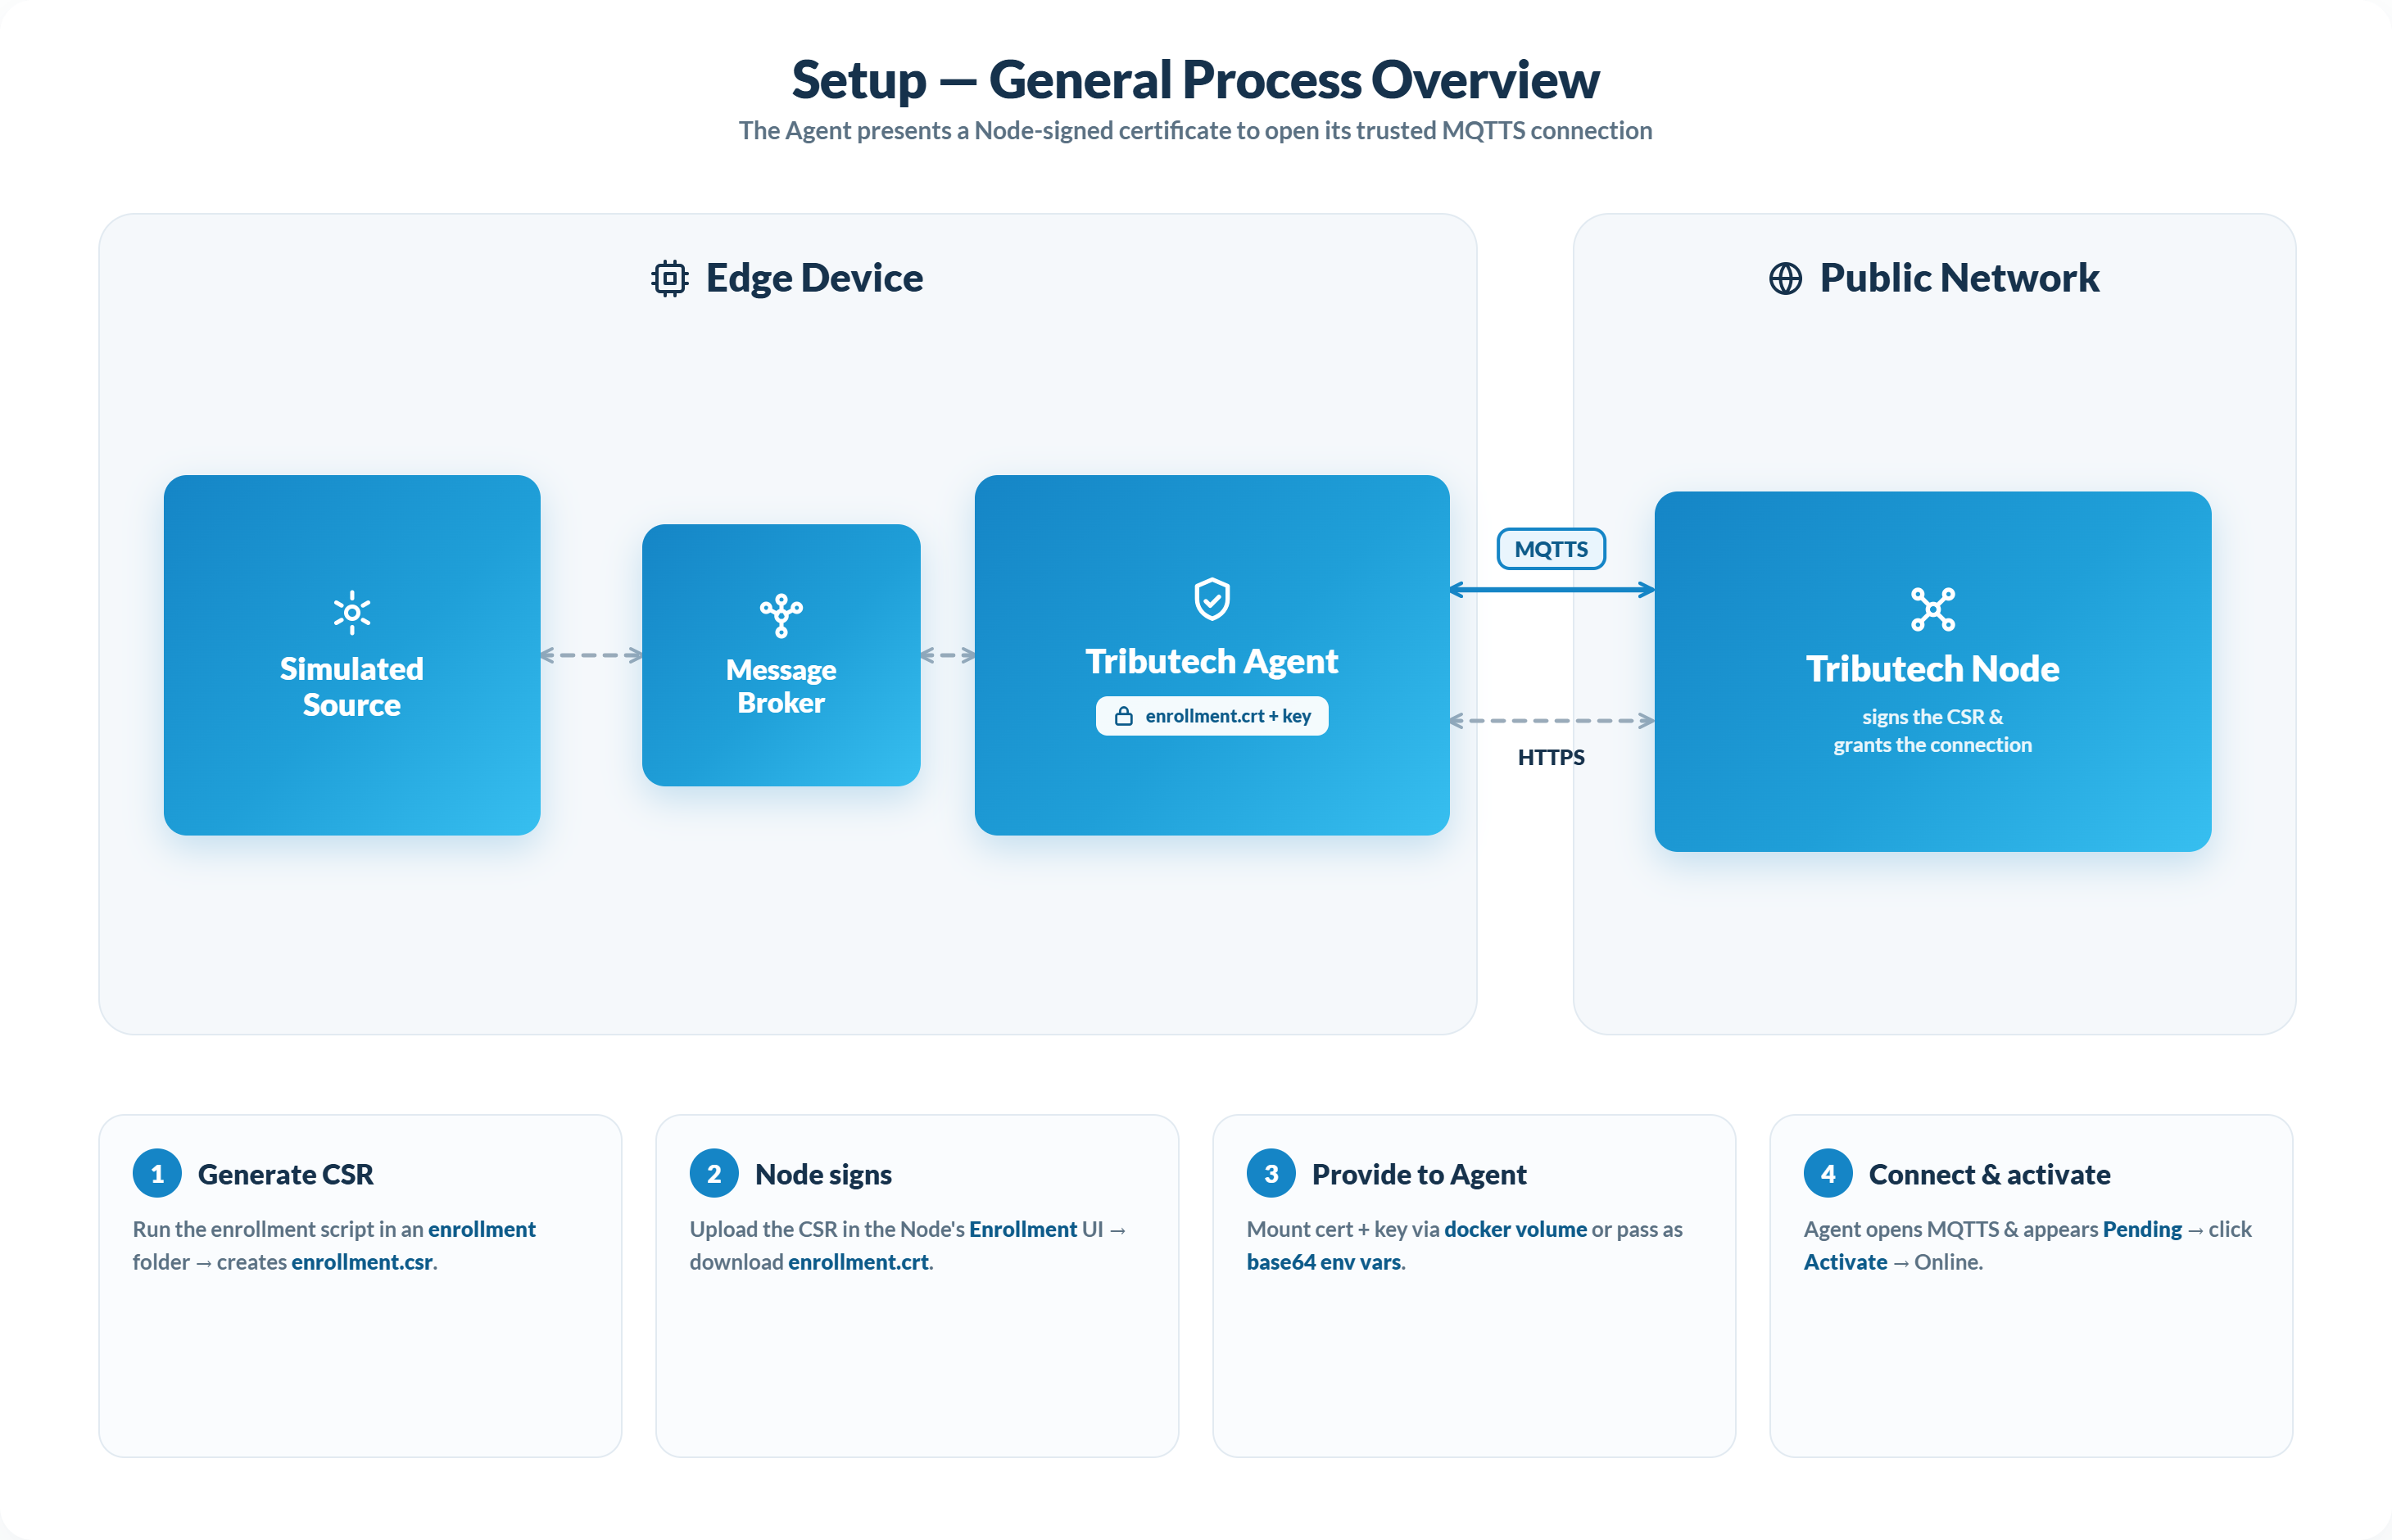
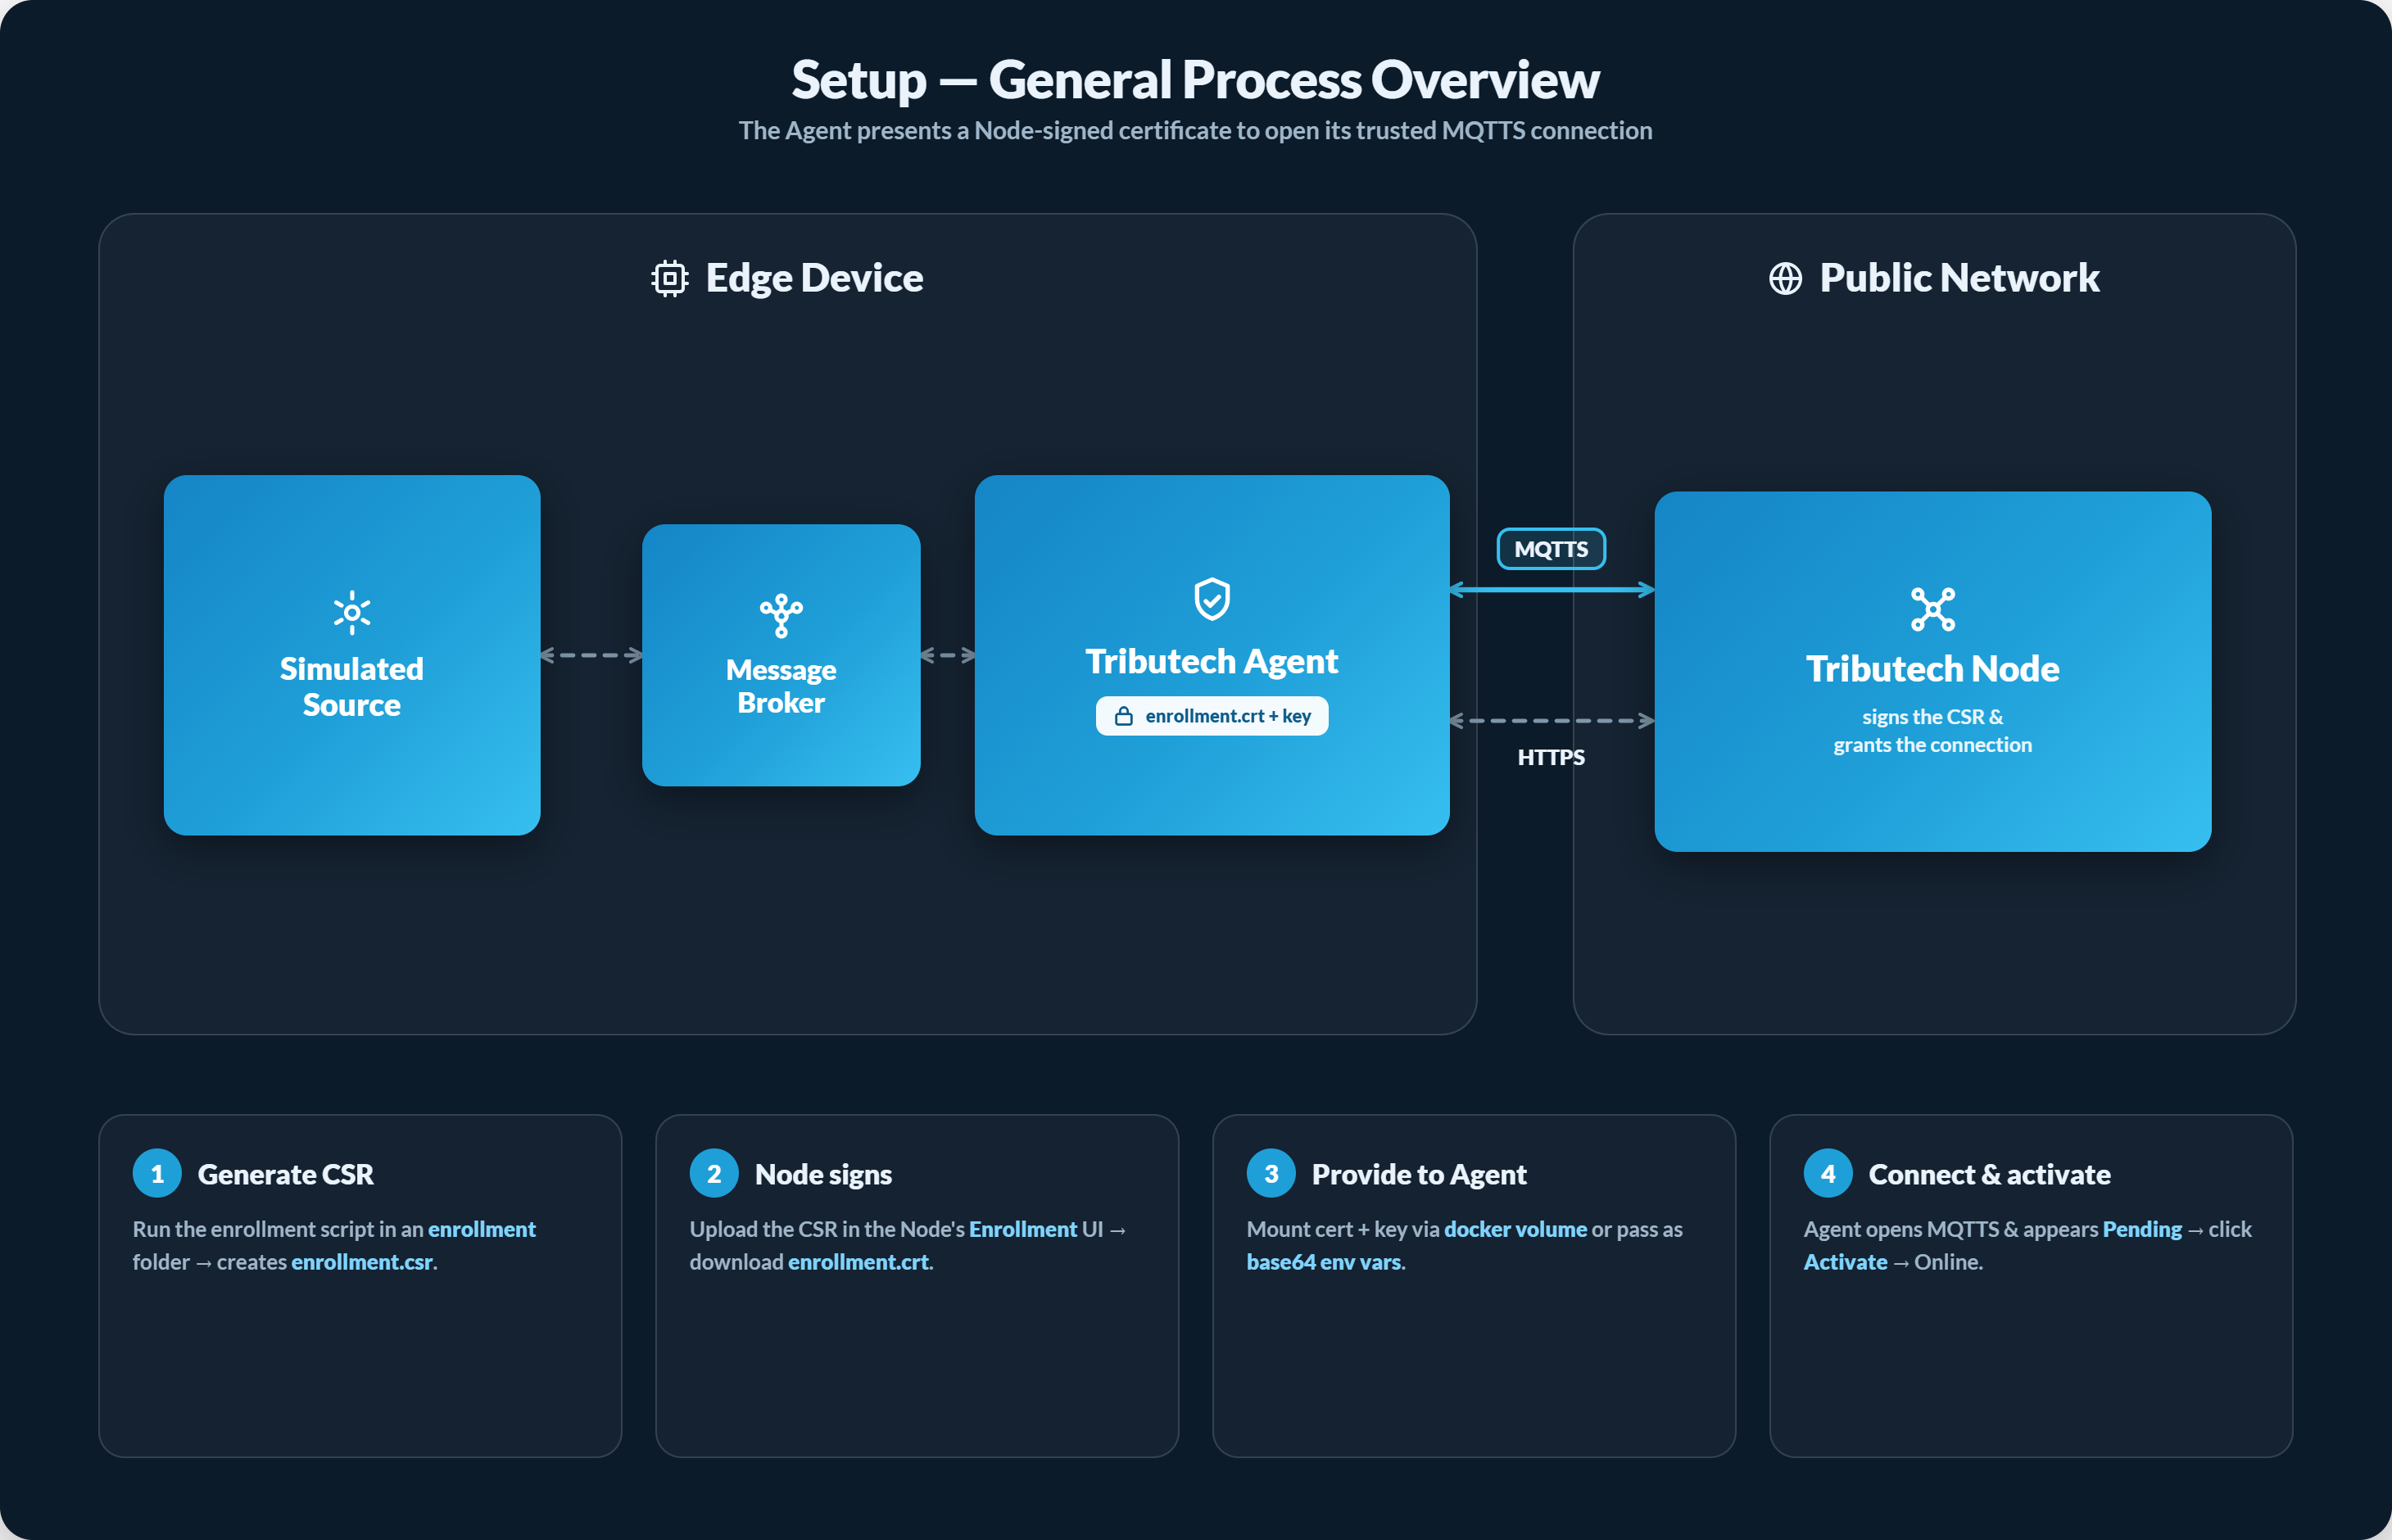
In this section we want to show how a Tributech Agent is setup up and can be used to securely transfer customer data from an edge device to the Tributech Node for inspection and verification. The Tributech Node is the common management point for all Tributech Agents connected to the Node. How a Tributech Agent operates and which Tributech Sources will be able to submit data is defined in Digital Twin Configuration of an Agent. This management of Agent is required after completing successfully the Agent Enrollment Process.
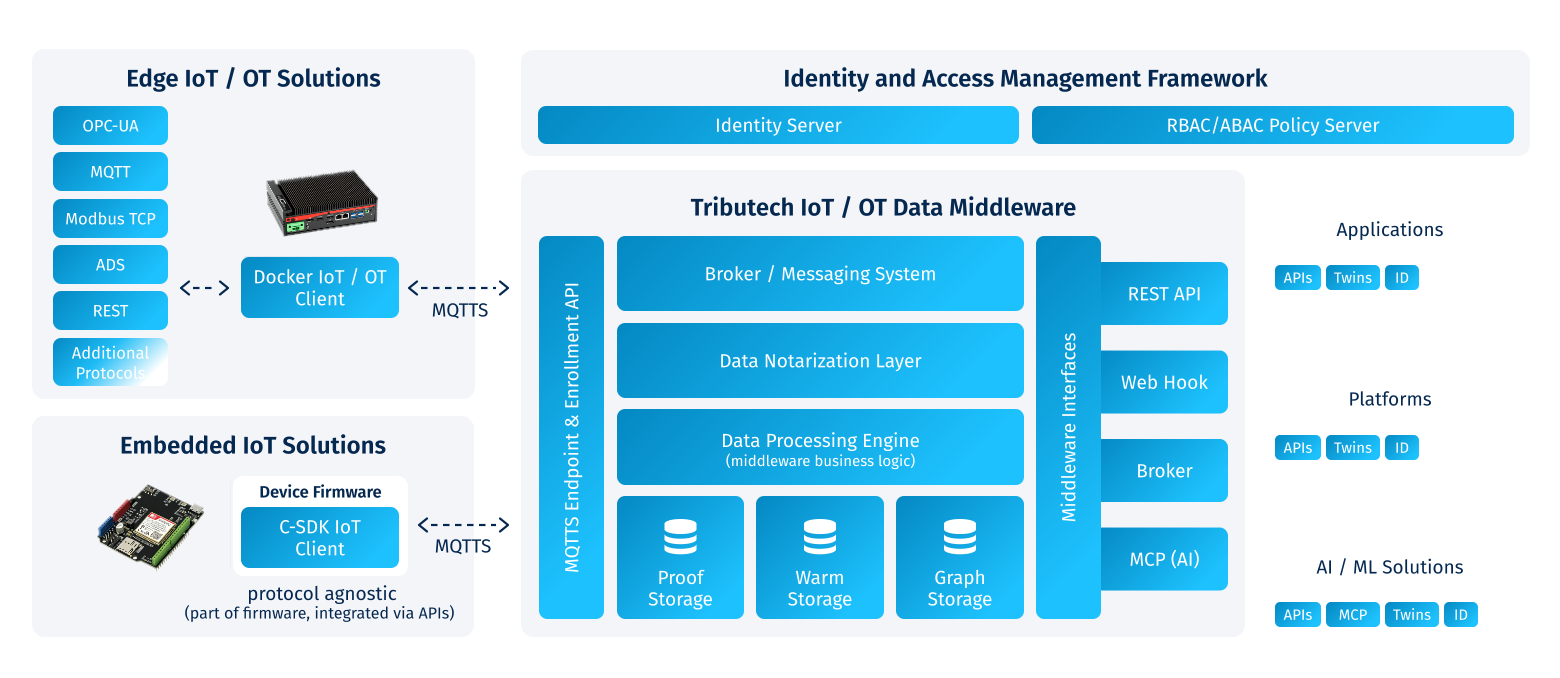
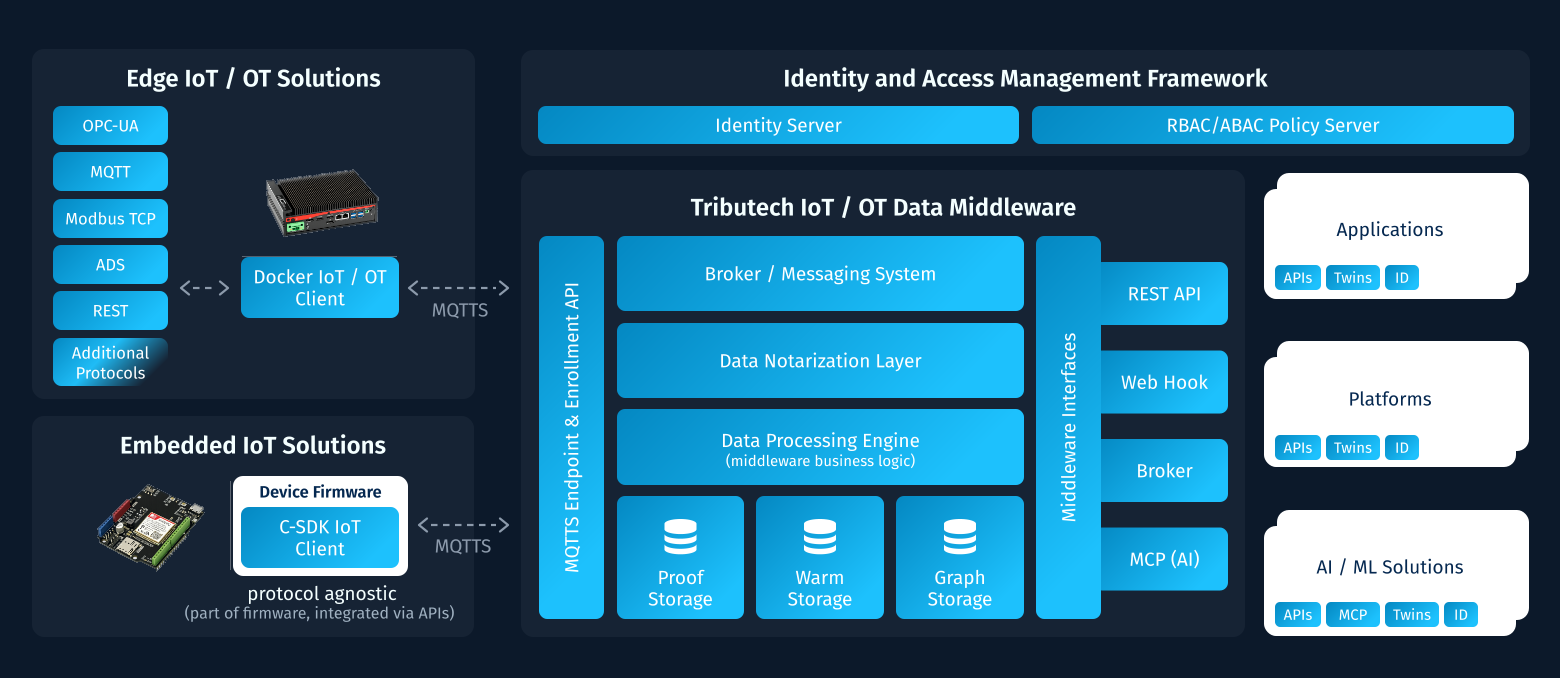
The diagram above shows where a Tributech Agent fits into the overall platform. On the edge device the Agent receives its data from Tributech Sources, which connect to the existing infrastructure via protocols such as OPC-UA, MQTT, ADS or REST — the Simulated Source used in this guide generates its values itself. Embedded devices that cannot run a container can instead integrate the Tributech C-SDK into their firmware and submit their data without a separate Source.
The communication between Tributech Sources and the Tributech Agent will take place on the same edge device via a local Message Broker connection. This channel is used on the one hand to send configurations and commands from Tributech Agent to the Tributech Source and on the other hand to send data streams from the Tributech Source to the Agent.
The Agent creates the proofs for the received values and transfers them together with the data to the Tributech Node over an outgoing MQTTS connection. The same connection is used for the Enrollment of the Agent and, in the opposite direction, for its Digital Twin Configuration and for commands. Within the Node the data is notarized, processed and persisted, so that the values, their proofs and the resulting twin graph remain available for verification.
External applications never communicate with a Tributech Agent directly. They consume the data through the interfaces of the Tributech Node — the REST API, Webhooks, a message broker or the MCP server — for which access is authorized following the OAuth 2.0 specification.
Authentication Certificates (Enrollment)
Before starting a Tributech Agent we need to get a Certificate signed by the Tributech Node
that is used during the initial authentication process to indicate that a Tributech Agent is allowed to establish a MQTTS connection to the Tributech Node. The certificate handling and initial establishing of a connection to the Tributech Node is called Enrollment and more information can be found in agent management. The overall enrollment flow — creating the certificate, providing it to the Agent and activating the connection — is summarized in the process overview diagram at the top of this page.
In order to create the certificate we visit the Enrollment section in the Tributech Node UI and select
+ Add Enrollment.
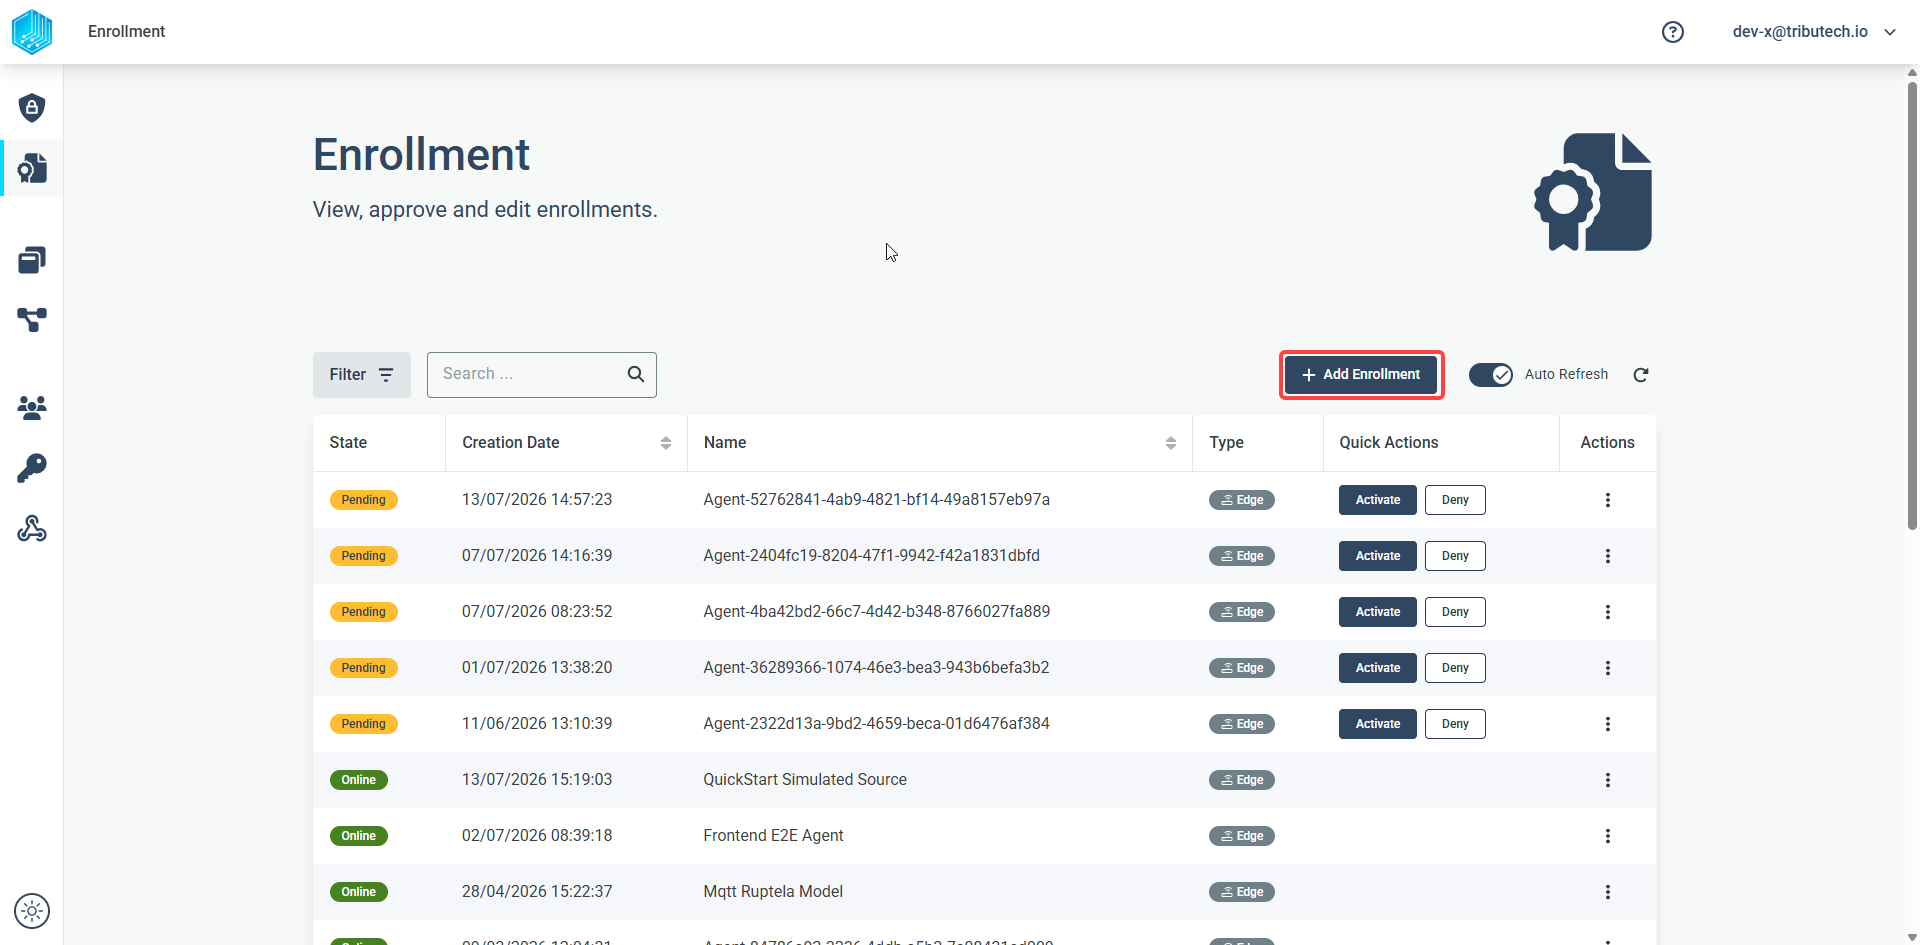
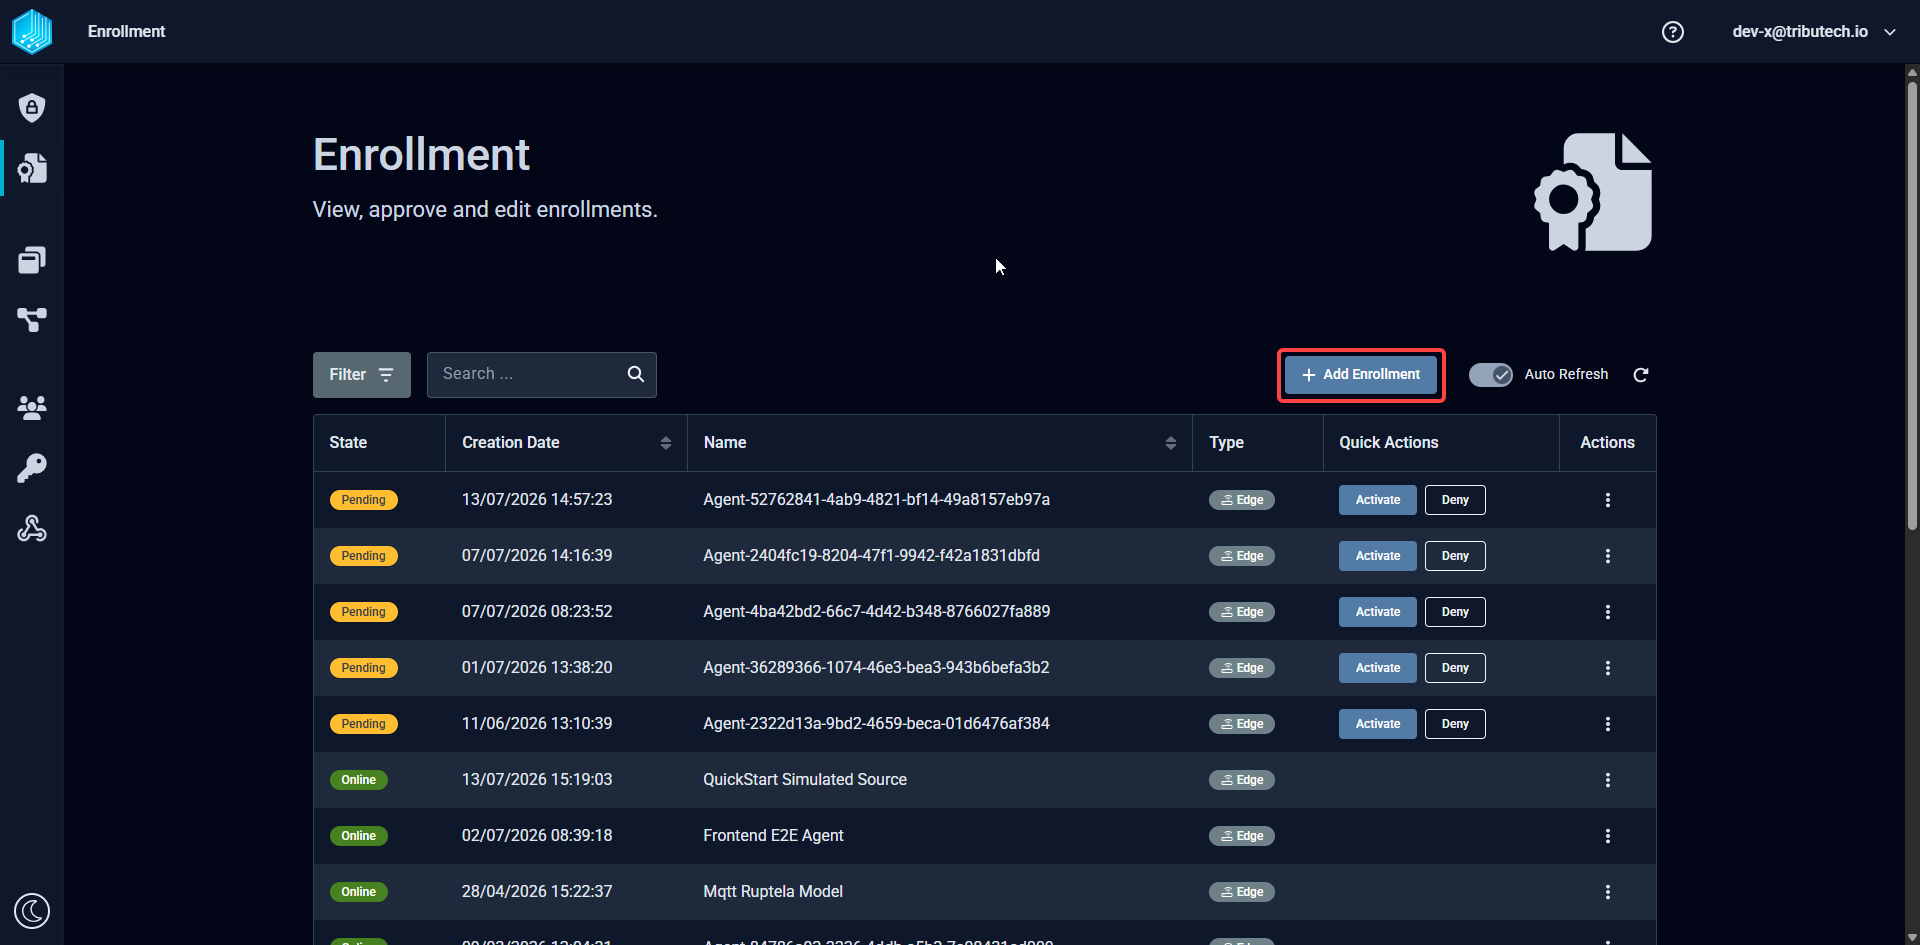
This action leads to the following window, which contains all the information the user needs to create the certificate.
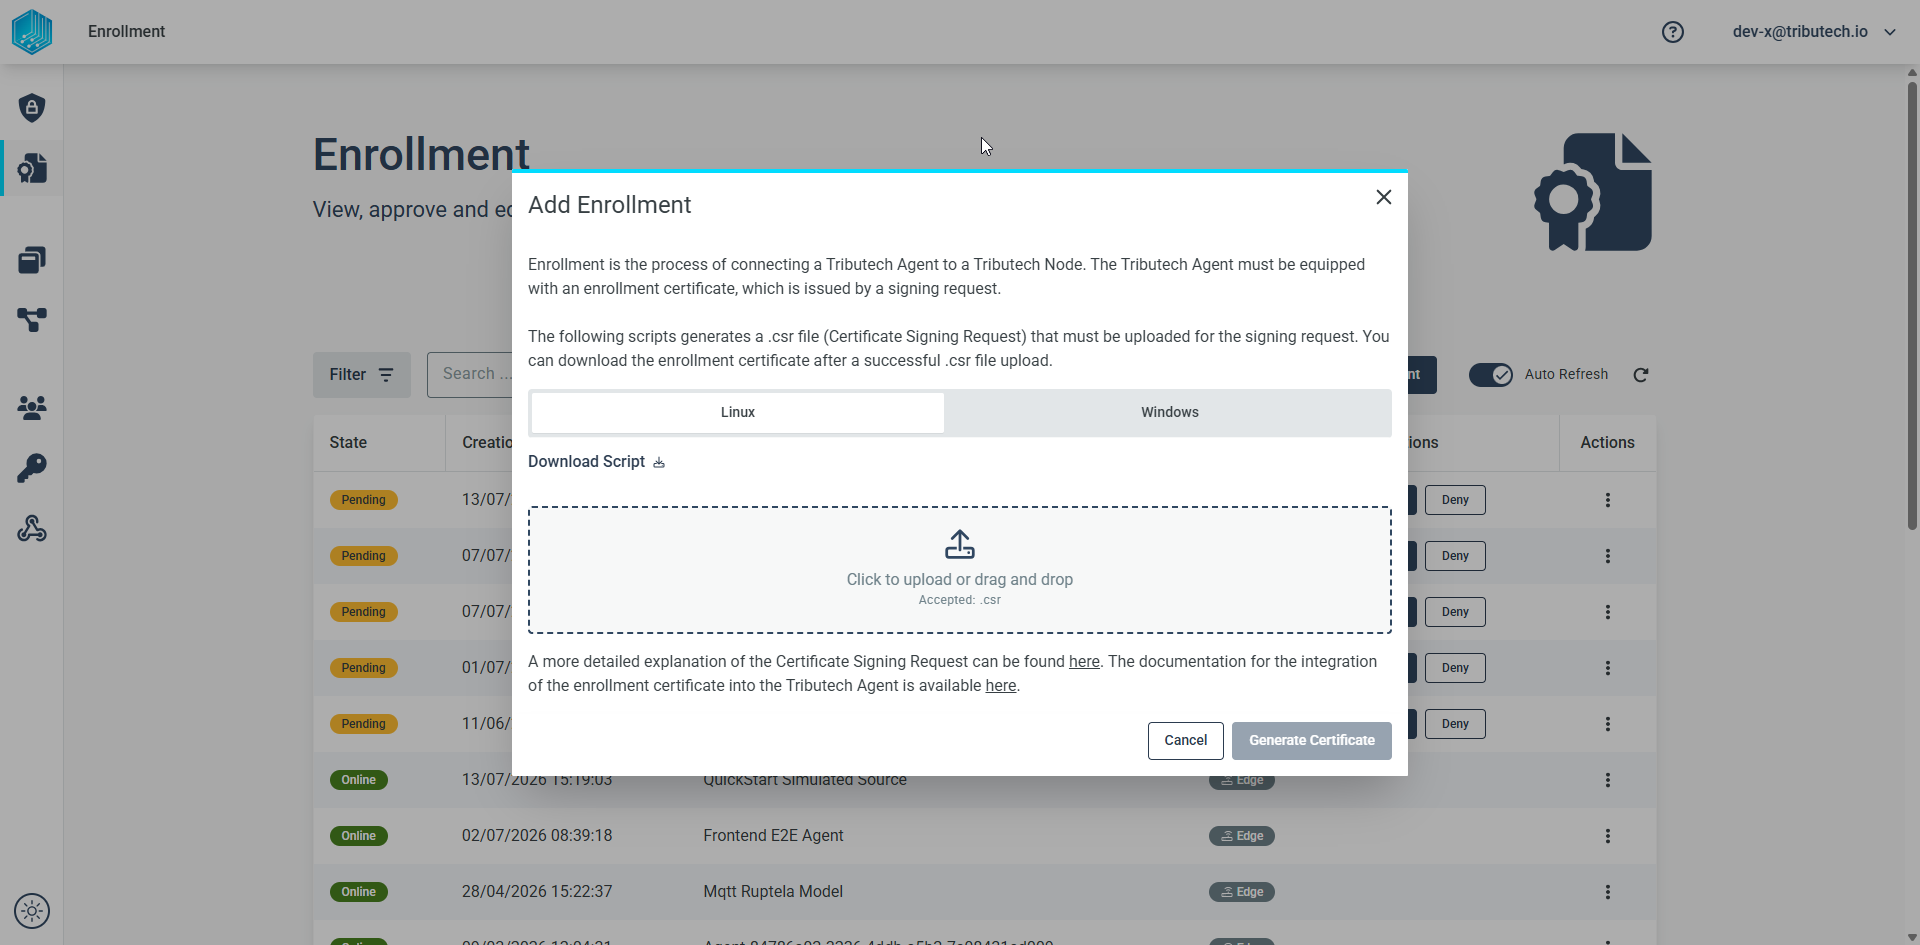
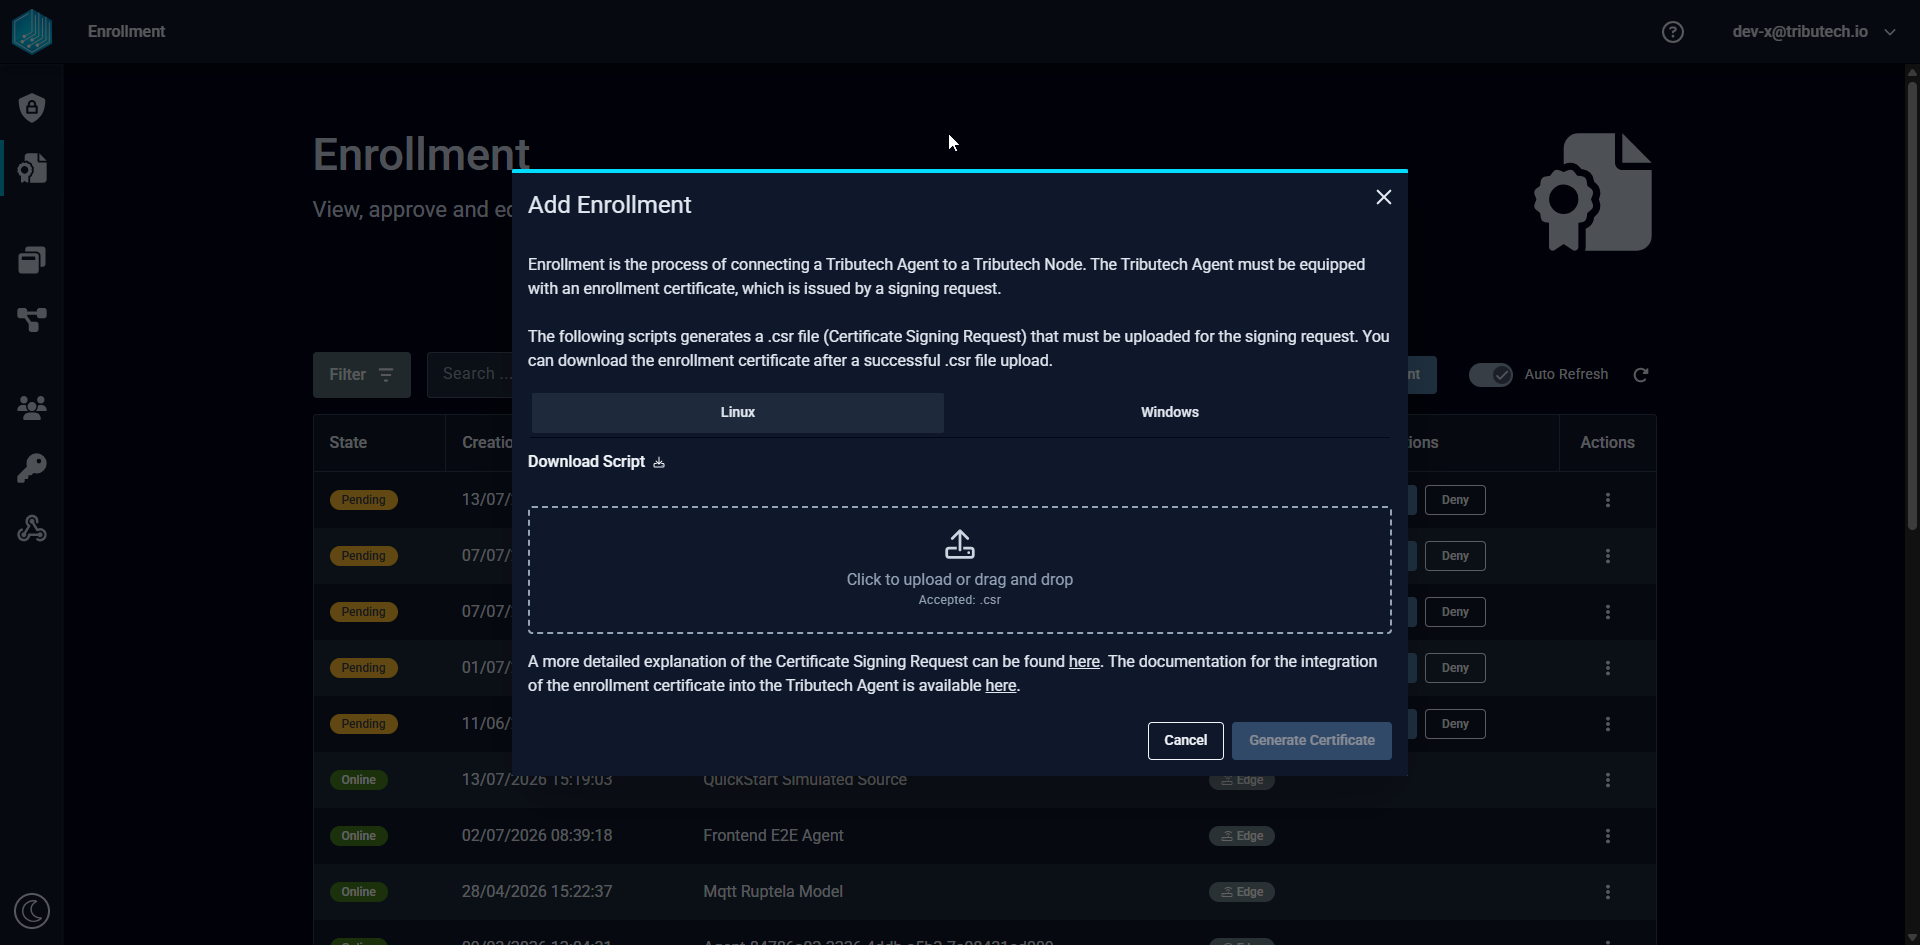
Download the script for the operating system of your choice Linux/Windows and execute the script in a empty folder named enrollment. Its important to note that the operating system does not
need to be identical to the Edge Device operating system. These Certificate Signing Request and certificates can be
created once and reused for multiple Tributech Agents. After successful execution of the script upload the enrollment.csr
in the Tributech Node UI Upload Dialog and submit it by clicking GENERATE CERTIFICATE. A enrollment.crt file is returned
after the successful generation and should be saved in the same folder next to the script. If problems or questions
occur during this process please consult the README for more details.
With the certificates present in a local folder, we call enrollment, we can now provide the certificates in two different ways to the Tributech Agent either via environment variables or via docker volumes which we will show later in detail during the Tributech Agent startup.
⚠️ enrollment.key file in the referenced folder must contain the enrollment key in the format:
-----BEGIN PRIVATE KEY-----
MIIEvAIBADANBgkqhkiG9w0BAQEFAASCBKYwggSiAgEAAoIBAQDB910tiUPf3jp3
...
JoTeVZlyPgWSr6ckDiYrXZCINfeupxIpUNa2dOTssJ7frddsOc65TjYaEGtQFhN9
UuhRTNXXB3LPeUekmFqAFw==
-----END PRIVATE KEY-----
⚠️ enrollment.crt file in the referenced folder must contain the enrollment certificate in the format:
-----BEGIN CERTIFICATE-----
MIIEhDCCAmygAwIBAgIVAMJHgTEKo6BAjM2x17MzqEoBAAAAMA0GCSqGSIb3DQEB
...
rTGtd7jookqEziPG7j9oN6Q4jQZI/fGeTDpz5JvEPriFWg4niwdZZVTVi4Axk0wT
Xb7SLA93BKc=
-----END CERTIFICATE-----
Docker volumes
Docker Volumes are the preferred mechanism for persisting data generated by and used by Docker containers.
To make local certificates folders available to a docker container we need to add the mount to our tributech-agent service.
The folder for the certificates can be adjusted as needed (./enrollment) only the :/app/enrollment needs to
stay the same.
services:
  # Prepares the bind-mounted folders for the Tributech Agent, which runs as the
  # non-root user 1654 and ships without the tooling to change ownership itself.
  # This replaces a manual `sudo chown -R 1654:1654 enrollment volumes` on the host.
  init-permissions:
    image: busybox:1.36
    user: "0:0"
    command: sh -c "chown -R 1654:1654 /mnt/enrollment /mnt/volumes"
    volumes:
      - ./enrollment:/mnt/enrollment
      - ./volumes:/mnt/volumes

  tributech-agent:
    image: ${DOCKER_REGISTRY-tributech.azurecr.io/}tributech-agent:${AGENT_TAG:-5.6.0}
    depends_on:
      mosquitto-server:
        condition: service_started
      init-permissions:
        condition: service_completed_successfully
    environment:
      - MqttOptions__MQTTHost=mosquitto-server
      - EdgeDeviceOptions__NodeUrl=${NODE_URL:?"The Tributech Node Url is required"}
    volumes:
      - ./volumes:/app/data #default directory for keys and datatwin file
      - ./enrollment:/app/enrollment # local enrollment folder mounted to /app/enrollment
    restart: unless-stopped

  mosquitto-server:
    image: eclipse-mosquitto:${MQTT_TAG:-1.6}
    restart: unless-stopped
The mounted folders must be accessible to the unprivileged user the Agent runs as, see Container File Permissions.
Environment Variables
The second way to add enrollment certificates to a Tributech Agent is to use environment variables. The content of the certificate files needs to be converted into a base64 encoded string without whitespaces, i.e. detailed information on how to convert a file into a base64 representation can be found here for Windows and Unix. We then add the base64 encoded content of the enrollment.crt (Certificate) as EnrollmentOptions__EnrollmentCertBase64 value and the EnrollmentOptions__EnrollmentKeyBase64 contains base64 encoded enrollment.key content.
services:
  # Prepares the bind-mounted folders for the Tributech Agent, which runs as the
  # non-root user 1654 and ships without the tooling to change ownership itself.
  # This replaces a manual `sudo chown -R 1654:1654 enrollment volumes` on the host.
  init-permissions:
    image: busybox:1.36
    user: "0:0"
    command: sh -c "chown -R 1654:1654 /mnt/volumes"
    volumes:
      - ./volumes:/mnt/volumes

  tributech-agent:
    image: ${DOCKER_REGISTRY-tributech.azurecr.io/}tributech-agent:${AGENT_TAG:-5.6.0}
    depends_on:
      mosquitto-server:
        condition: service_started
      init-permissions:
        condition: service_completed_successfully
    environment:
      - MqttOptions__MQTTHost=mosquitto-server
      - EdgeDeviceOptions__NodeUrl=${NODE_URL:?"The Tributech Node Url is required"}
      - EnrollmentOptions__EnrollmentCertBase64=LS0tLS1CR...VEUgS0VZLS0tLS5X
      - EnrollmentOptions__EnrollmentKeyBase64=LS0tLS1CRU...VEUgS0VZLS0tLS0K
    volumes:
      - ./volumes:/app/data #default directory for keys and datatwin file
    restart: unless-stopped

  mosquitto-server:
    image: eclipse-mosquitto:${MQTT_TAG:-1.6}
    restart: unless-stopped
Even without a mounted enrollment folder the Agent still needs a writable data folder, see
Container File Permissions.
Container File Permissions
Starting with version 5.4.0 the Tributech Agent and Tributech Source images are hardened: everything that is not
required to run the application has been stripped from the image, and the application no longer runs as root but as a
dedicated unprivileged user with the user id 1654. This reduces the attack surface, because an attacker who gains
access to a container finds neither a shell nor any stray tooling to work with, and holds no root privileges.
This has one practical consequence for the setup. A Tributech Agent uses two local folders:
./enrollment— created by you, holds the enrollment certificates the Agent reads on startup. Not needed when the certificates are supplied via environment variables../volumes— created by Docker on the first start, holds the Agent's own persistent data: its keys, the generated certificates and the datatwin file. Always required.
Both are mounted into the container from the host, and for such mounts the host file ownership applies inside the
container. The folders must therefore be accessible to user id 1654, otherwise the Agent cannot read its certificates
or write its keys. It cannot correct this itself, because the hardened image contains no tooling to change ownership.
⚠️ This affects the enrollment certificates in particular: enrollment.key is created with owner-only
permissions, so an Agent running as user id 1654 cannot read it even though the file is present. Mounting the folder
read-only does not avoid the problem.
Preparing the folders
Our docker-compose.yml examples solve this with an additional init-permissions service. It runs a small helper
container that adjusts the ownership of both folders and then exits, before the Agent is started:
  init-permissions:
    image: busybox:1.36
    user: "0:0"
    command: sh -c "chown -R 1654:1654 /mnt/enrollment /mnt/volumes"
    volumes:
      - ./enrollment:/mnt/enrollment
      - ./volumes:/mnt/volumes
The Tributech Agent then waits for it to finish successfully:
  tributech-agent:
    depends_on:
      init-permissions:
        condition: service_completed_successfully
The helper container needs no privileges on the host, because the Docker daemon already runs as root. The paths on the
right hand side (/mnt/...) are only used inside the helper container and can be named freely — what matters are the
host folders on the left. When the certificates are provided via environment variables, the
./enrollment folder does not exist and only ./volumes needs to be prepared.
Alternatively the ownership can be adjusted once manually on the host, which requires root privileges:
sudo chown -R 1654:1654 enrollment volumes
💡 Both variants transfer the folders to user id 1654, which means your own user can no longer modify them. To keep
access, e.g. to renew the enrollment certificates later, set your own group instead of 1654 as the group
(id -g prints it):
chown -R 1654:<your group id> enrollment volumes
Starting a Tributech Agent
After we have prepared the Tributech Agent certificates for the enrollment we can now startup whole environment.
In our example, we will provide the enrollment certificates through a local enrollment folder mounted as a docker volume. If the base64 environment variable method is preferred
the tributech-agent-simulated docker-compose.yml file in the following examples must be adapted as described in the previous section.
⚠️ In our examples for the setup documentation, we will use different container images and configurations compared to the Quickstart. Please use a new empty folder for the files to prevent any configuration mix.
We have a docker-compose.yml prepared for a quick and easy setup containing a MQTT Message Broker, a Tributech Agent and a Tributech Simulated Source. Note that the local MQTT Message Broker is required for the communication between the Tributech Agent and a Tributech Simulated Source on the Edge Device
and will not be used for interactions with the Tributech Node.
version: "3.6"

services:
  # Prepares the bind-mounted folders for the Tributech Agent, which runs as the
  # non-root user 1654 and ships without the tooling to change ownership itself.
  # This replaces a manual `sudo chown -R 1654:1654 enrollment volumes` on the host.
  init-permissions:
    image: busybox:1.36
    user: "0:0"
    command: sh -c "chown -R 1654:1654 /mnt/enrollment /mnt/volumes"
    volumes:
      - ./enrollment:/mnt/enrollment
      - ./volumes:/mnt/volumes

  source-simulated:
    image: ${DOCKER_REGISTRY-tributech.azurecr.io/}tributech-source-simulated:${SOURCE_TAG:-5.3.0}
    depends_on:
      - mosquitto-server-simulated
      - tributech-agent
    environment:
      - MqttOptions__MQTTHost=mosquitto-server-simulated
      - Logging__LogLevel__Default=Information
    networks:
      - simulated-net
    restart: unless-stopped
    logging:
      driver: "json-file"
      options:
        max-size: "2m"
        max-file: "5"

  tributech-agent:
    image: ${DOCKER_REGISTRY-tributech.azurecr.io/}tributech-agent:${AGENT_TAG:-5.6.0}
    depends_on:
      mosquitto-server-simulated:
        condition: service_started
      init-permissions:
        condition: service_completed_successfully
    environment:
      - Logging__LogLevel__Default=Information
      - Logging__Console__FormatterName=simple
      - MqttOptions__MQTTHost=mosquitto-server-simulated
      - EdgeDeviceOptions__NodeUrl=${NODE_URL:?"The Tributech Node Url is required"}
    # ports:
    #   - "5001:8080"
    networks:
      - simulated-net
    volumes:
      - ./volumes:/app/data # volume mapping for permanent storage of keys and datatwin file
      - ./enrollment:/app/enrollment # local enrollment folder mounted to /app/enrollment
    restart: unless-stopped
    logging:
      driver: "json-file"
      options:
        max-size: "2m"
        max-file: "5"

  mosquitto-server-simulated:
    image: eclipse-mosquitto:${MQTT_TAG:-1.6}
    networks:
      - simulated-net
    # ports:
    # - '1883:1883' # MQTT
    # - "127.0.0.1:9001:9001" # web-socket
    restart: unless-stopped

networks:
  simulated-net:
Docker Compose provides a ready-made setup, but some settings must be adapted to the environment in which it is executed:
EdgeDeviceOptions__NodeUrlis the absolute URL to the Tributech Node the agent should connect to
Sample values:
tributech-agent:
    ...
    environment:
      ...
      - EdgeDeviceOptions__NodeUrl=https://my-environment.tributech-node.com
The Tributech Agent authenticates with the Tributech Node using enrollment certificates provided through a local enrollment folder mounted into the container (the ./enrollment:/app/enrollment volume in the docker-compose.yml above). See Authentication Certificates (Enrollment) and Docker volumes above for how to create and provide it. If the base64 environment variable method is preferred instead, adapt the service as shown in the Environment Variables section. If no Agent ID is configured, the agent generates a random one on first start.
We can now Startup the environment by running the following command:
docker compose up -d
Validate that all containers are running. The output should return that every container is in the state Up
docker compose ps
If you encounter problems with starting the containers please consult the official docker documentation and revisit the requirements.
If all container are up and running we can inspect the Tributech Agent and check if its in the expect state by checking the logs for a recurring message Enrollment is not finished yet and needs to be confirmed by a user on the Node.
docker compose logs -f tributech-agent-simulated
This message means that we now have a running Tributech Agent which requires permission from the Tributech Node to establish a connection. Our current setup is started with the default values for the Tributech Agent and Tributech Source and requires to be configured in the Tributech Node in order to send sample data.
Activate Agent
After the docker containers have been started successfully the Agent will connect to the specified environment automatically. The user has to check if the Agent is present in the enrollment section. To access the enrollment the user just has to click on Enrollment in the left management panel of the Tributech UI.
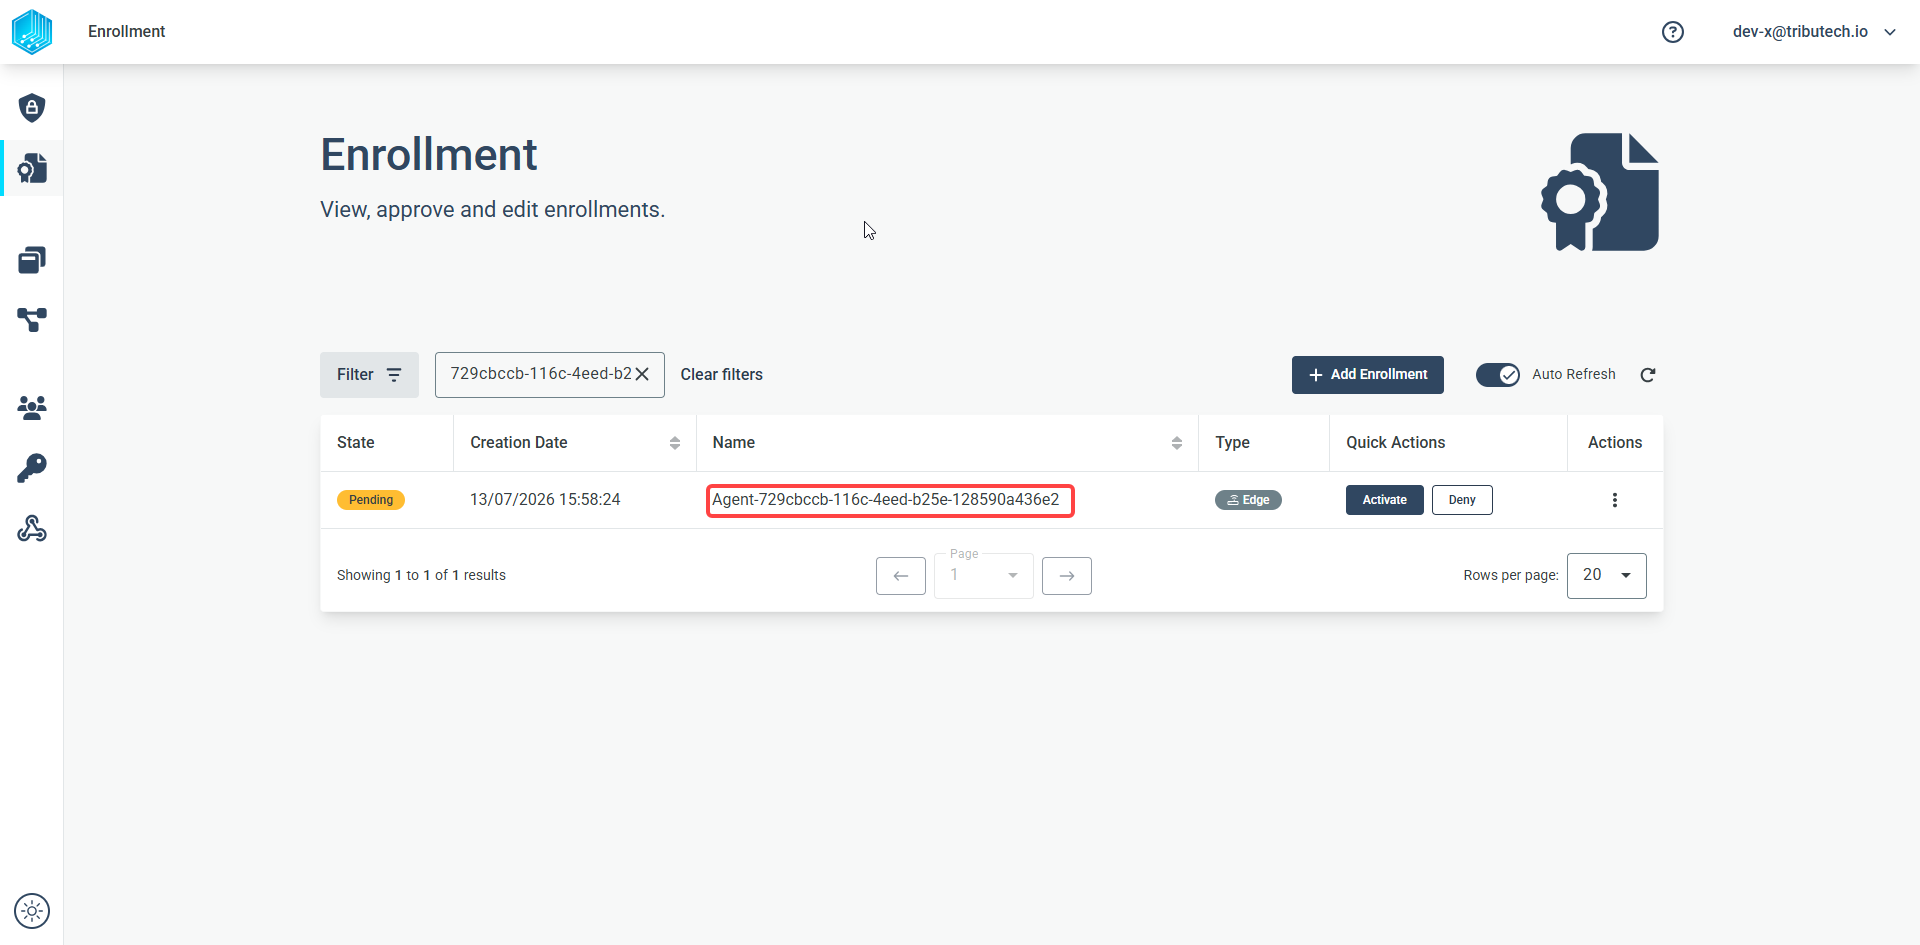
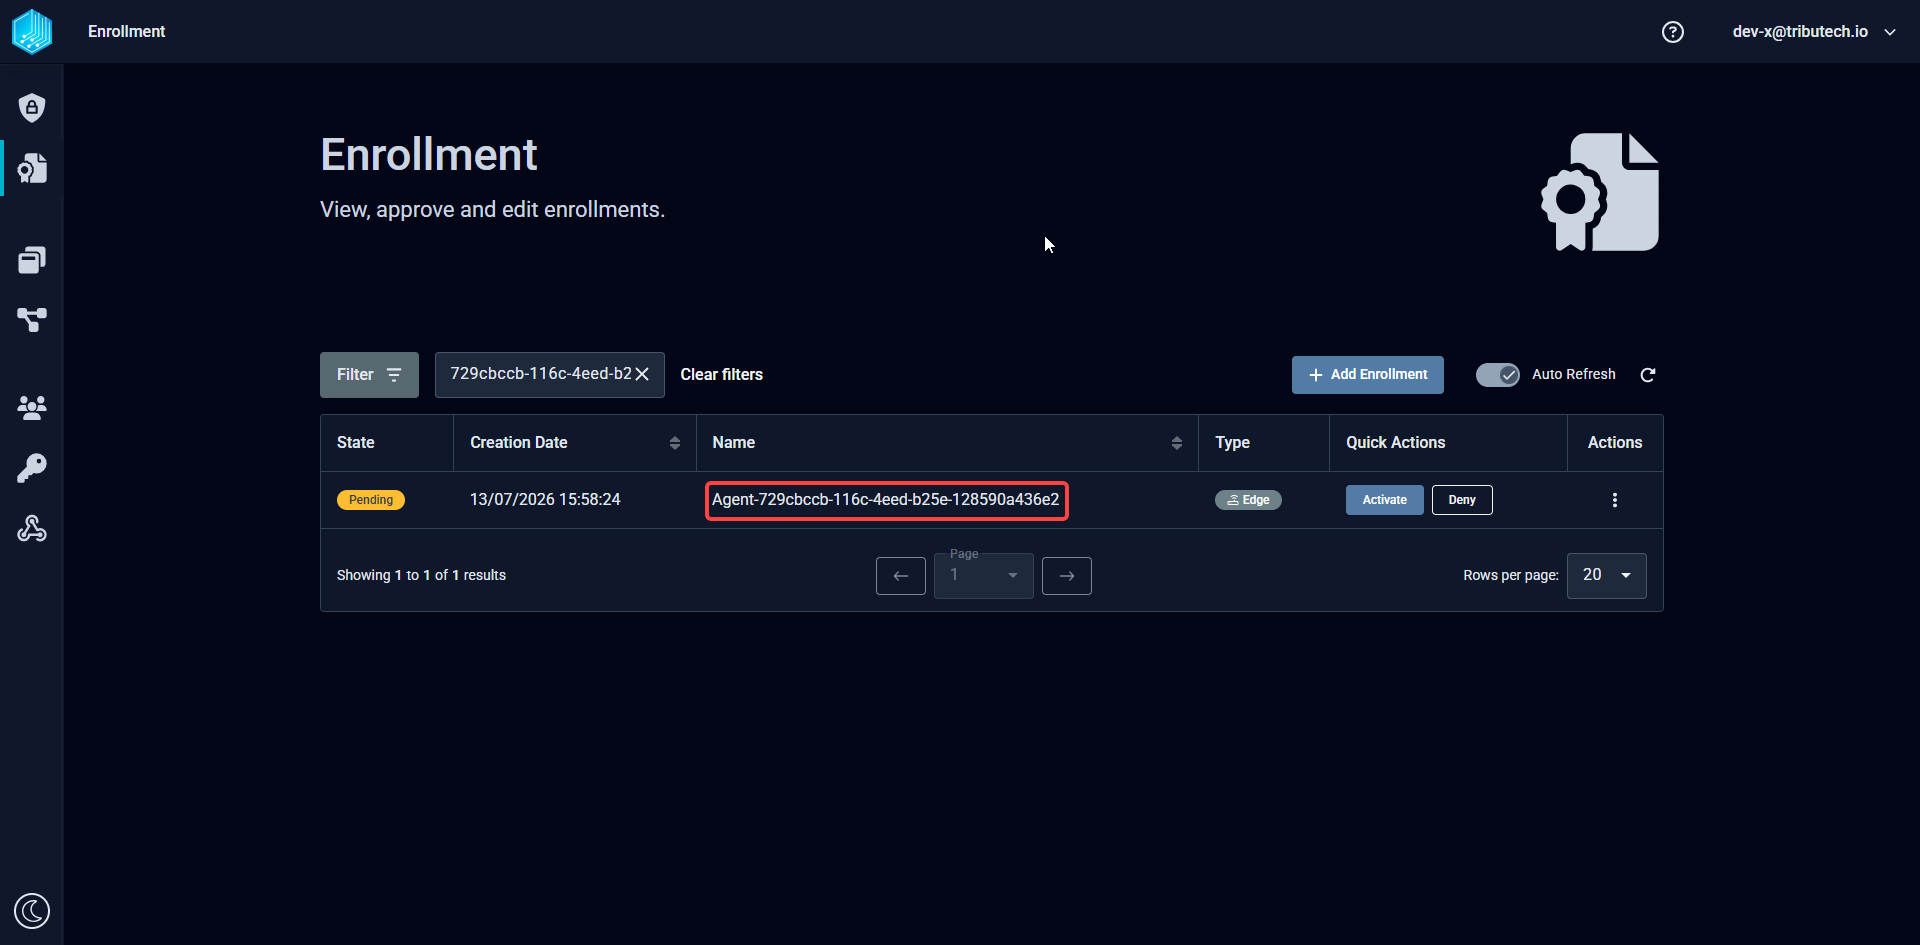
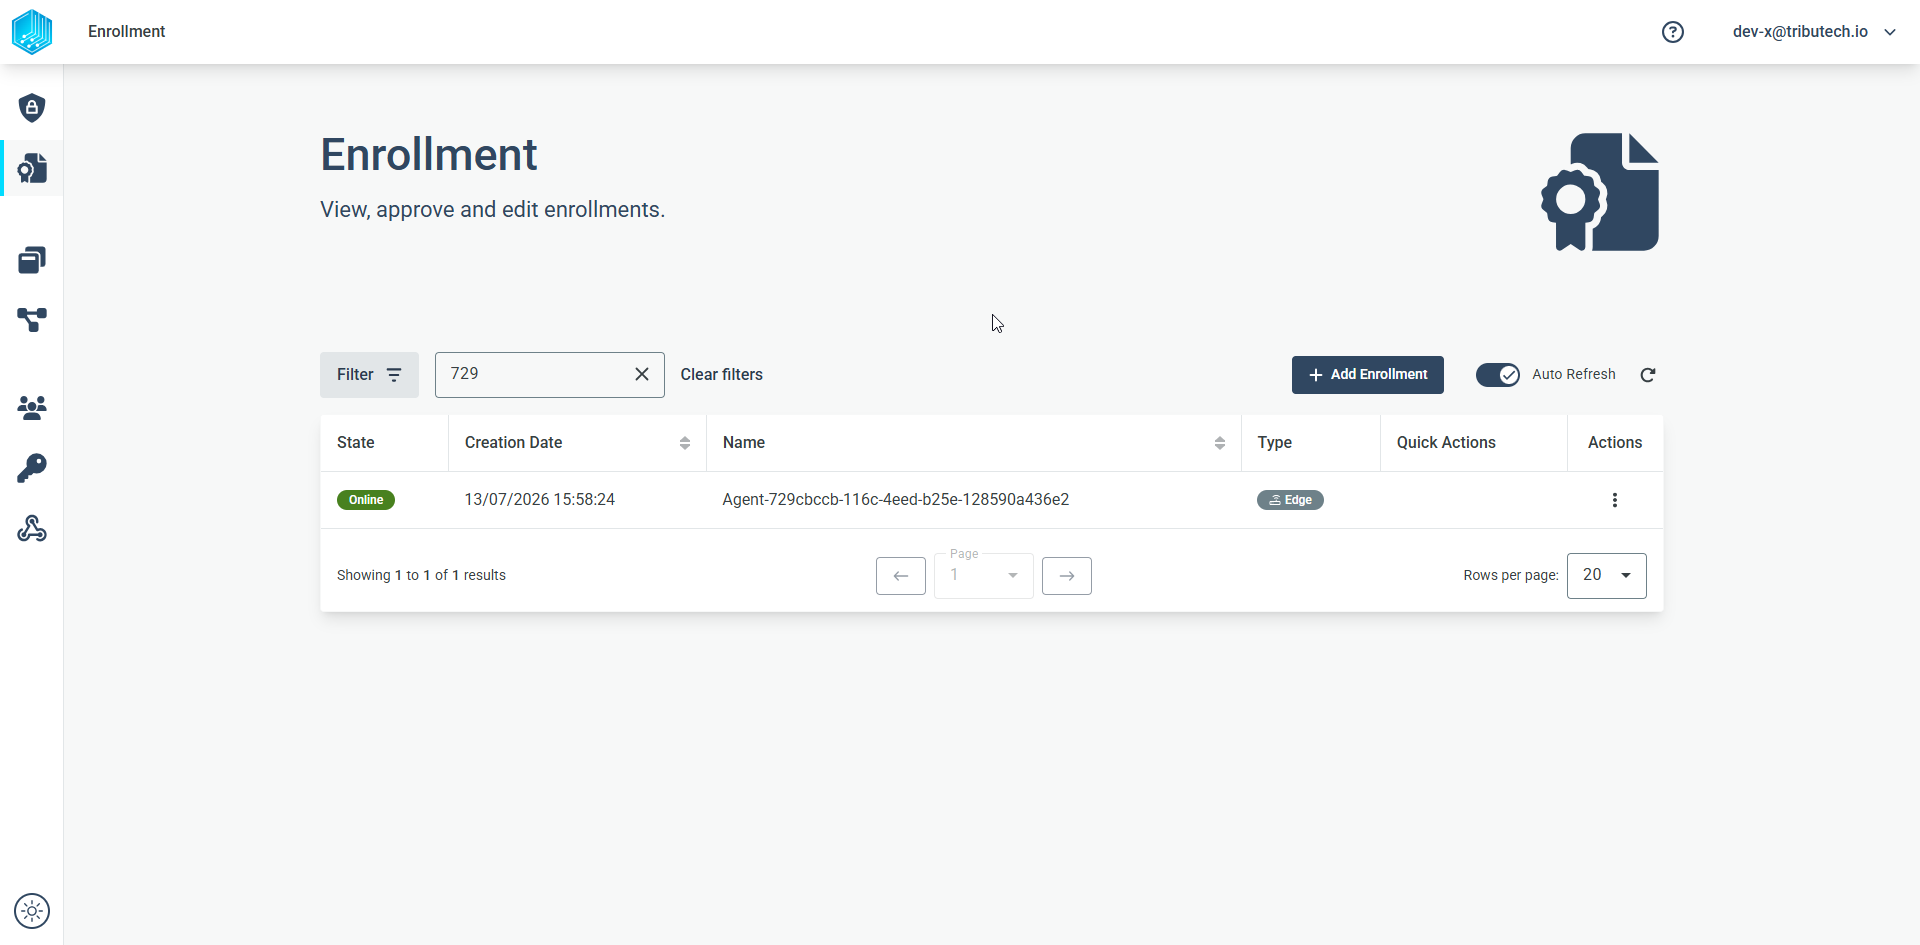
The newly started Agent should be one of the top most entries of the list and should be in the Pending state. You can also identify it by the Creation Date column, which reflects when the enrollment started — sorting the list by Creation Date brings the most recently enrolled agent to the top. By clicking on the Activate button we grant our agent the permission to connect and be managed by this Tributech Node. For more information on agent management in the Tributech Node visit agent management.
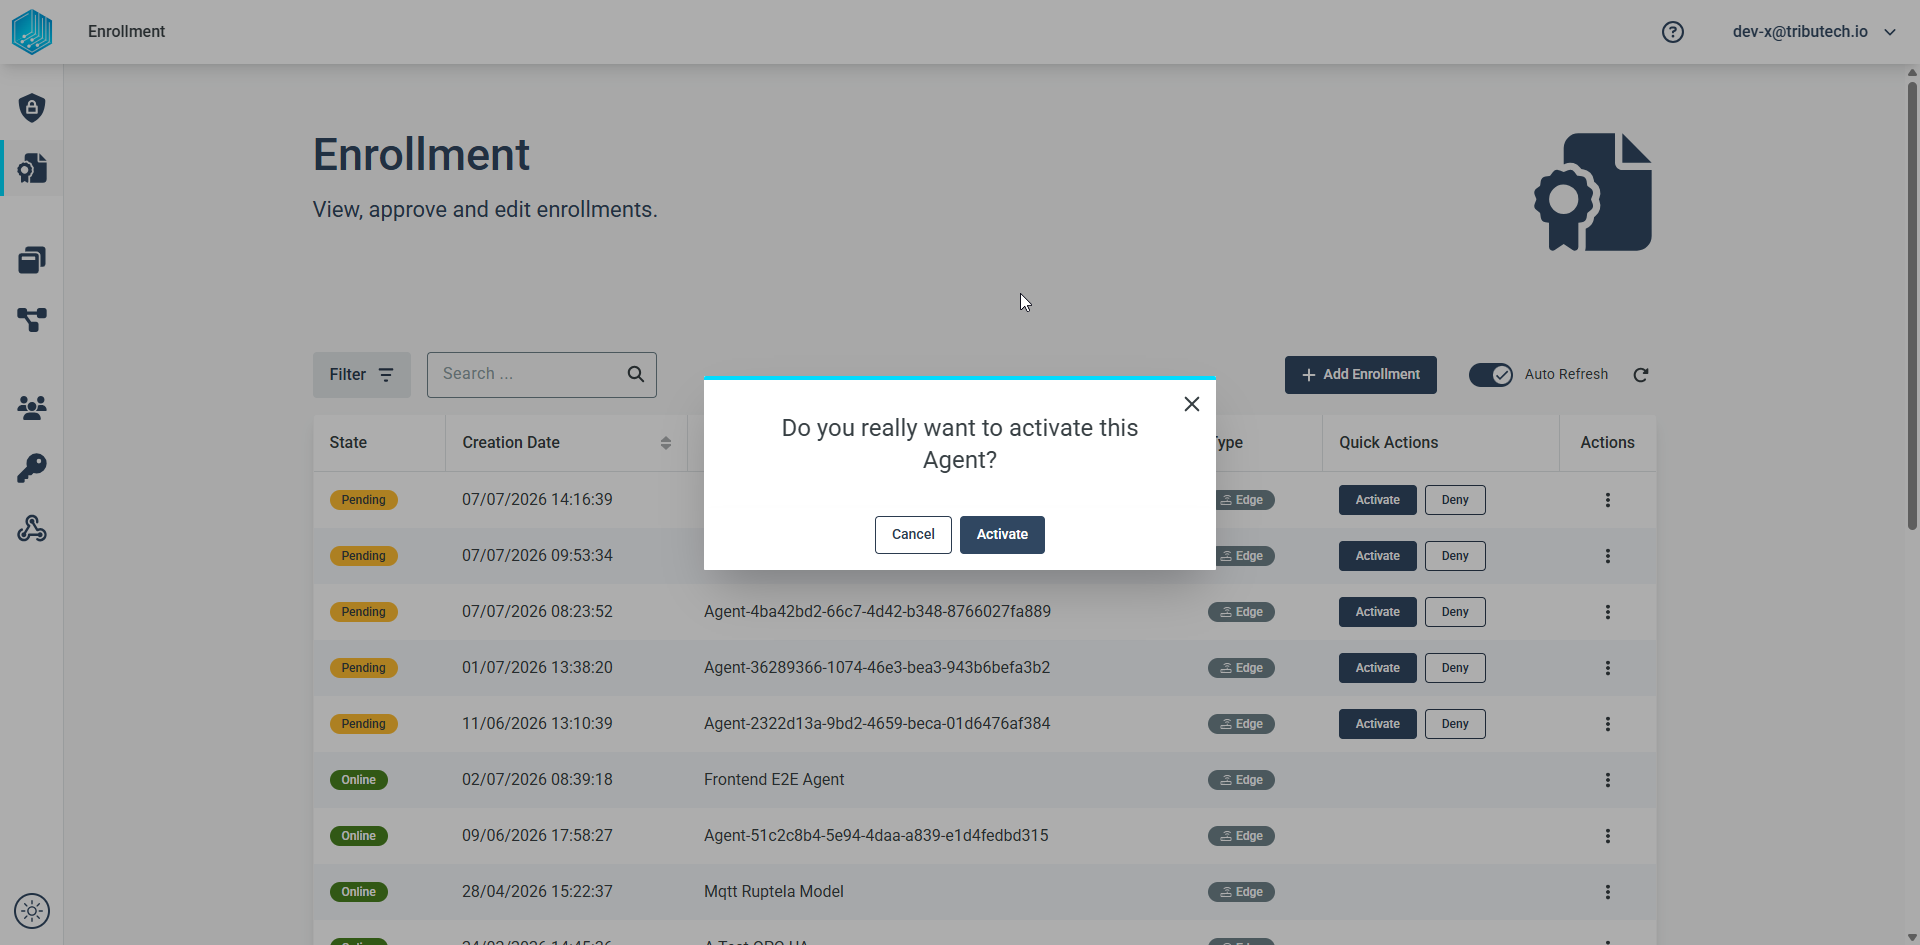
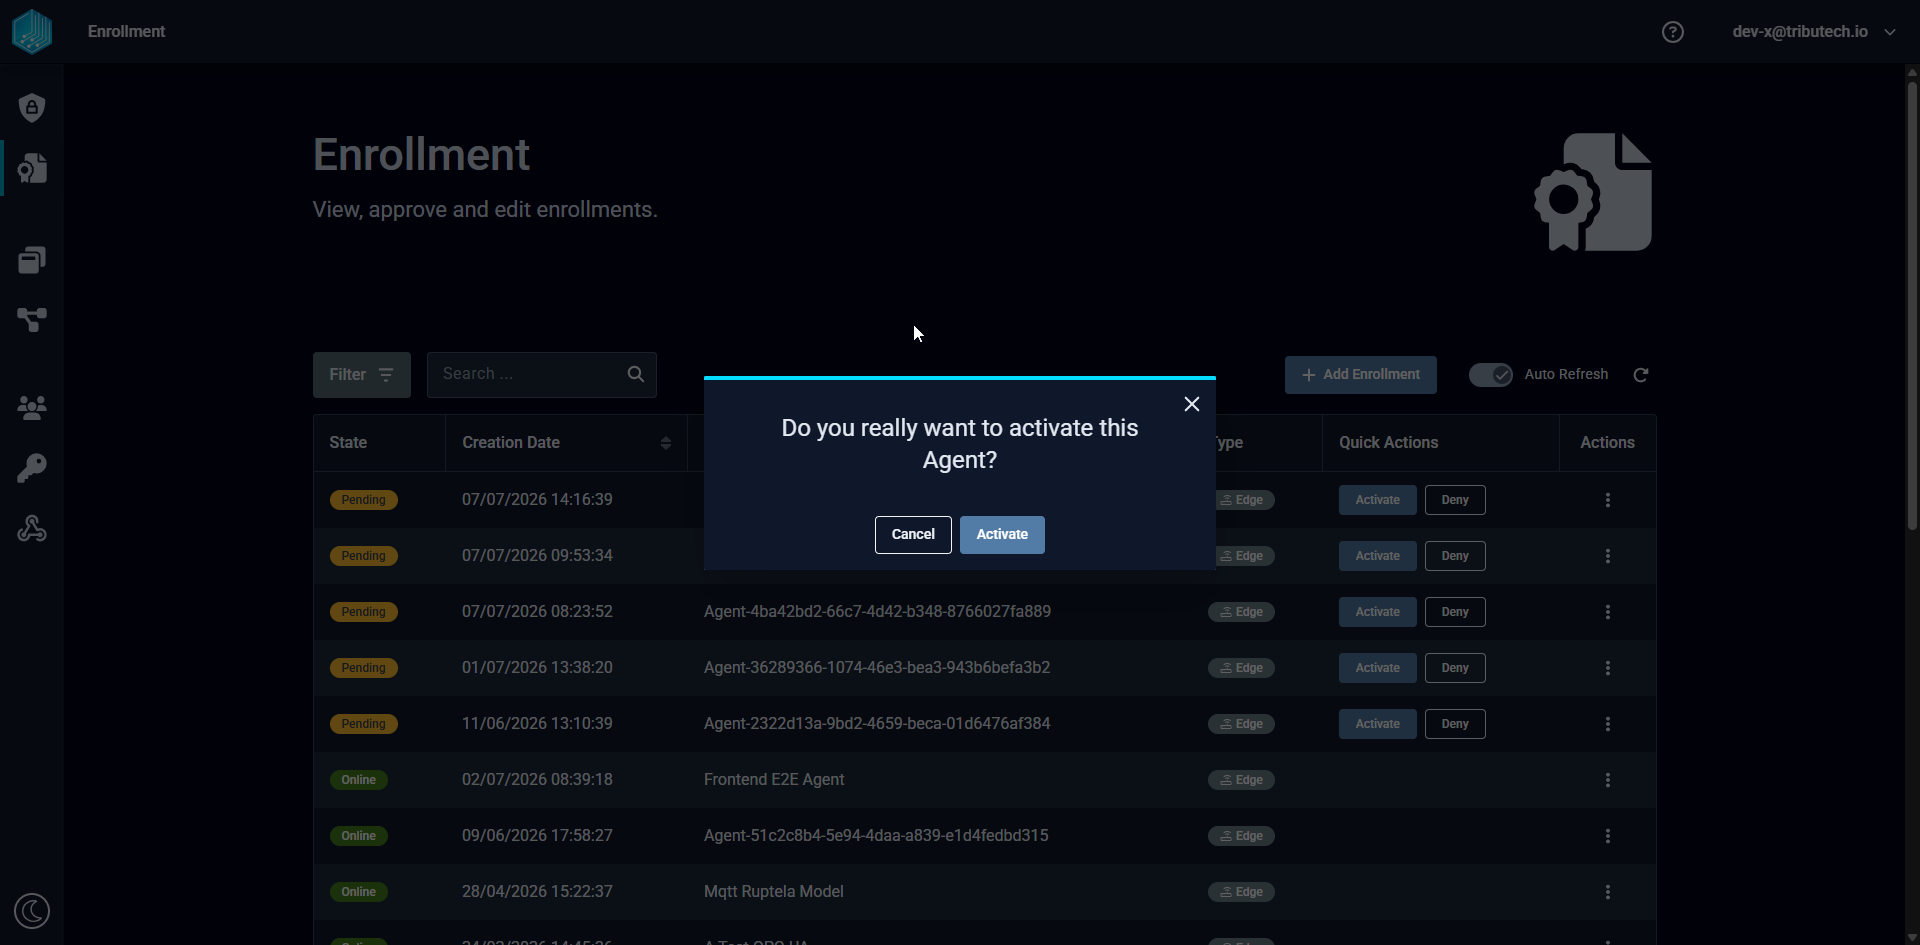
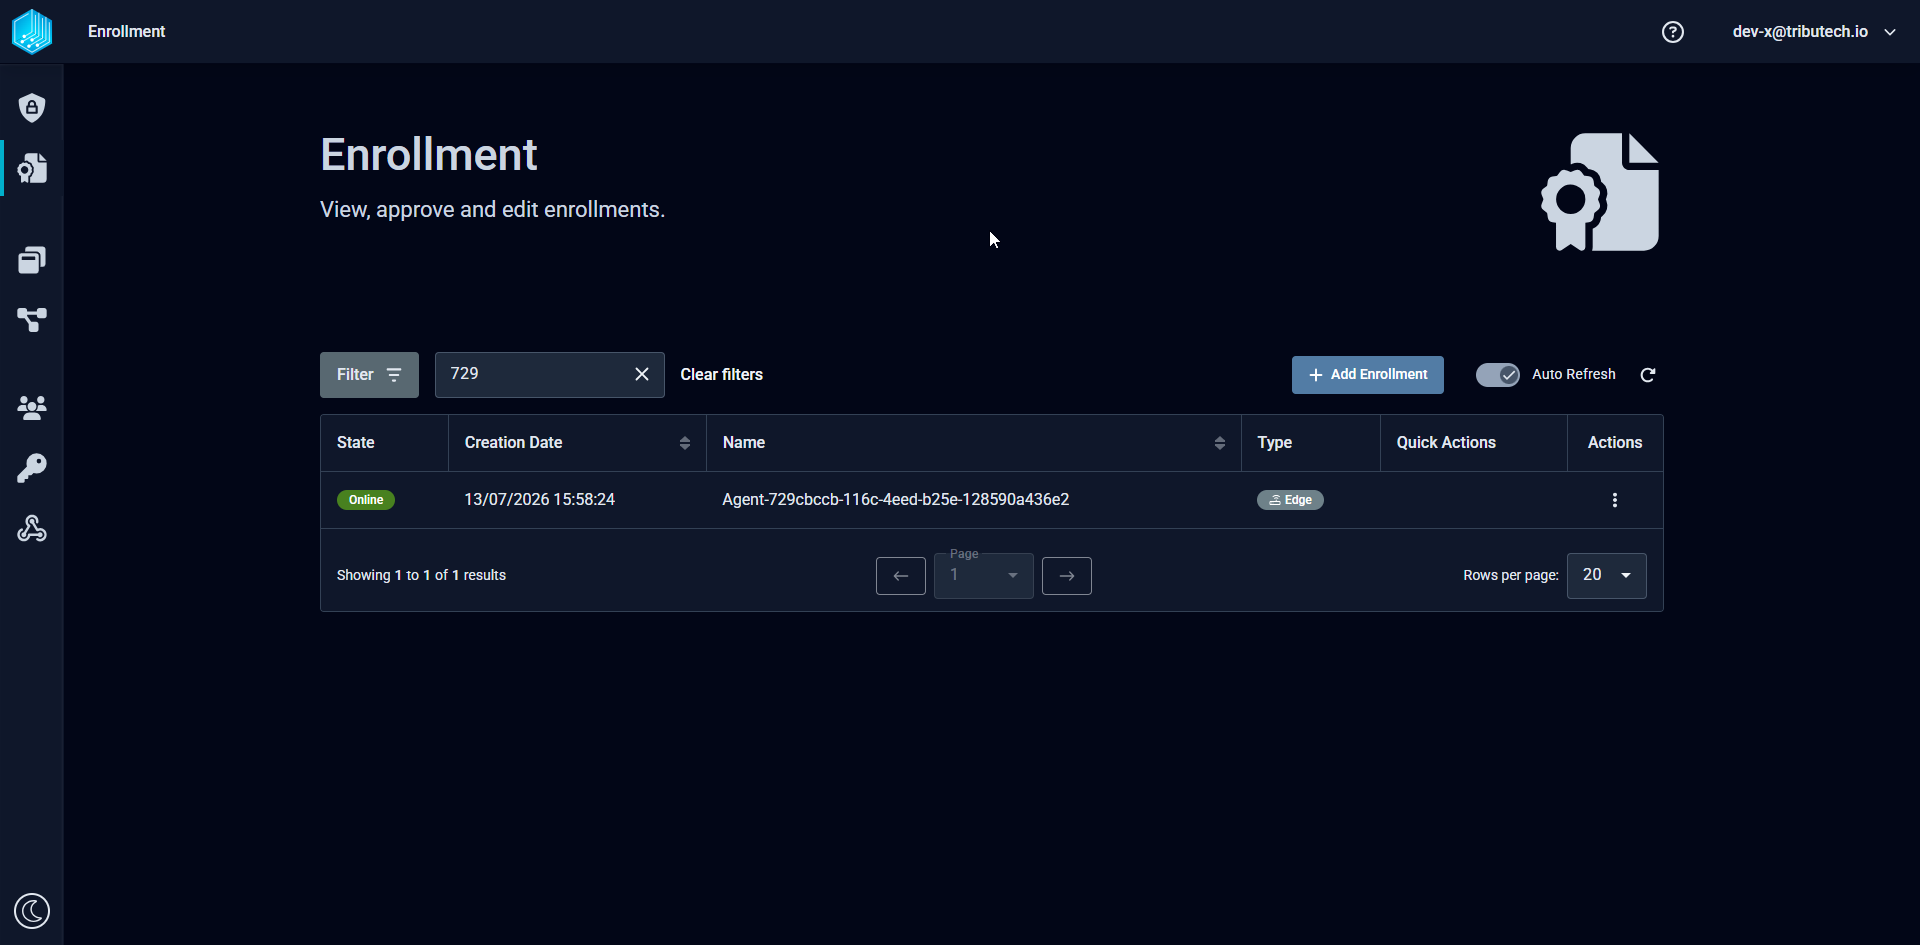
After the successfully activating the agent state will switch from Pending to Online which indicates that the Tributech Agent is now ready to be configured. In the current state the Tributech Agent has a connection to the Tributech Node established but does not have any configuration. This means it does not know of any Tributech Sources on the same Edge Device.
To complete the configuration of a Tributech Agent visit the configuration section.